Best Call of Duty Black Ops 2 Map Pack
About TranZit
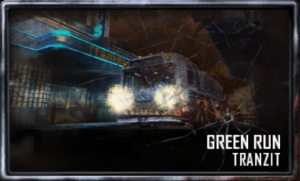
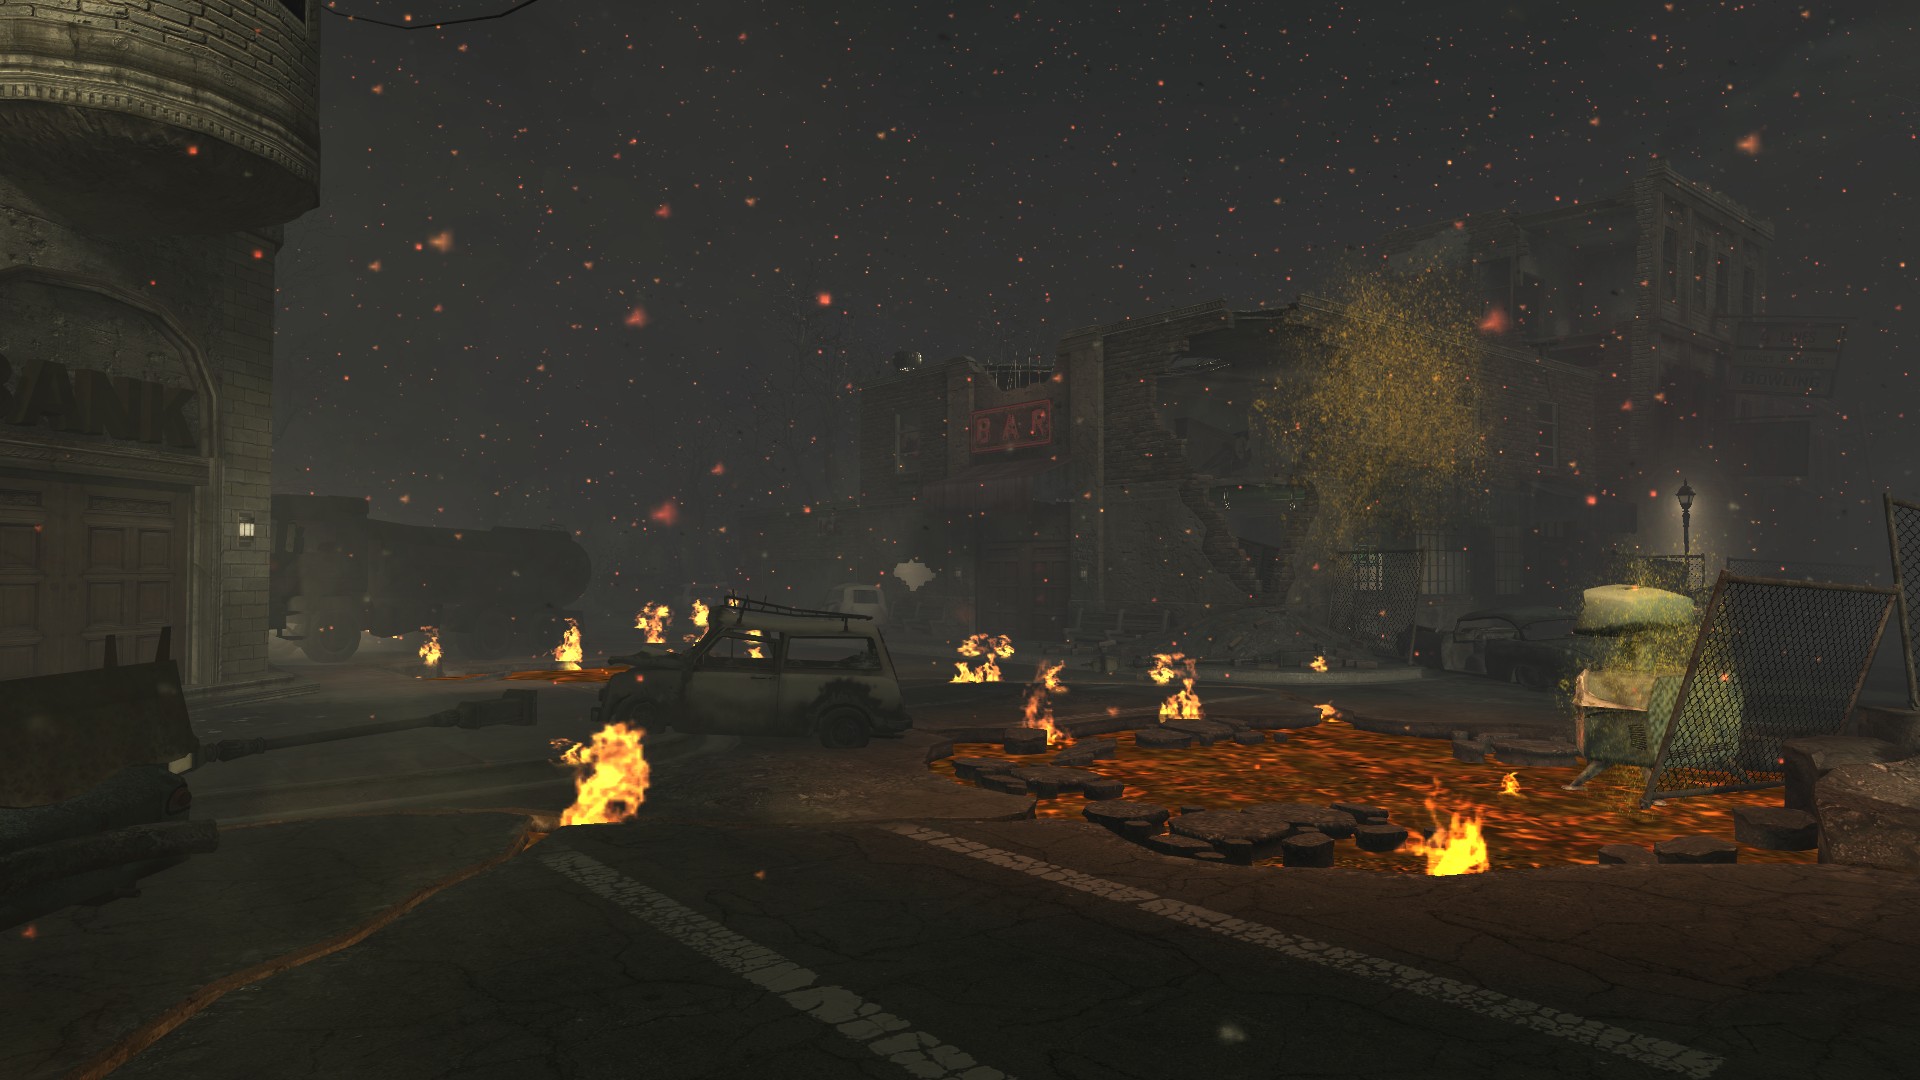
TranZit is a Zombies story mode featured in Call of Duty: Black Ops II.
TranZit functions like any other Zombies maps aside from the size of the map and some of the new utilities. A new feature, buildables, allows the player to pick up parts and construct certain items, which offer useful mechanics to aid the survivors in game. Examples include the Pack-a-Punch Machine; a new Wonder Weapon, the Thrustodyne Aeronautics Model 23 (commonly referred to as the Jet Gun); a turbine-like handheld power source; an electric trap; an improvised automatic machine gun turret; and a Zombie Shield, the Zombies variant of the multiplayer weapon, the Assault Shield.
The player can also add upgrades, such as ladders and plows, to the bus to aid them by preventing zombies from breaching the bus, or allowing access to the bus roof. Two new types of enemies appear, the Denizen and the Avogadro.
--------------------------------------------------------------------------------------------------------------------------------------
Key Features of TranZit
Key Features of TranZit
- Turbines (buildable)
- Pack - A - Punch (buildable)
- Zombie Shield (buildable)
- Turret (buildable)
- Power
- Perks (Quick Revive, Speed Cola, Double Tap Root Beer, Mule Kick, Tombstone, Jugernaut, Stamin-Up)
- Electric Trap (buildable)
- Jet Gun (buildable weapon)
- Bus (Upgradeable vehicle)
- Bowie Knife (Distinct Wall Weapon)
- Galvaknuckles(Distinct Wall Weapon)
- Nav Table (Cross - Map Easter Egg)
- MP5 (Wall Weapon)
- Olympia (Wall Weapon)
- Colt M16A1 (Wall Weapon)
- AK74U (Wall Weapon)
- Avogadro (Boss)
- Denziens (Mini Boss)
--------------------------------------------------------------------------------------------------------------------------------------
The Map
Here is a map of TranZit for those of you who need it: 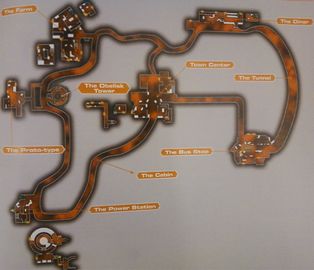
Bus Stop (Starting Location) Weapons and Parts Locations
- M14 - Inside the bus station, between a notice board and some lockers, on the wall under the light.
- Olympia - Inside the bus station, opposite of the front door.
- Quick Revive - Located inside the bus station, at the far end of a small hallway, right next to the
main door. - Turbine - Parts: Dress-maker's doll, leaning on the map; model plane tail near/under the payphones; and a fan blade on the seats next to the door that requires power from the Turbine.
- Navcard - Located to the left of the bus station, behind the barrier-underground entrance and in
front of a dumpster. - NAV table part 1 - The meteorite is located in a hole in the wall, near the box location.
- Turbine Door - Right next to the Turbine workbench. Possible bus part inside. Can be used to
bypass the main exit from the bus station. - Box location - In the front of the depot, outside.
- Teddy bear location - On a bench at the far right of the bus depot.
Tunnel
- Colt M16A1 - On the wall facing the player as they exit the bus.
- Jet Gun - The Jet Engine is located in 3 different places in the tunnel.
- NAV table part 2 - The board will be close to the Colt M16A1. If it is not there, it will be in the power
station.
Note: The bus does not stop in the tunnel, as it is not a destination.
Diner

- MP5 - Inside the diner, right of Speed Cola.
- Galvaknuckles - On the roof of the diner. Only accessible with the Roof Hatch of the bus. Note that
using the part in the bus will render the Galvaknuckles inaccessible. - Speed Cola - Inside the diner, near the MP5.
- Zombie Shield - Can be built in the repair shop next to the diner. It requires two parts, a car door
and a cart trolley. The car door can be found in three locations within the repair shop: left side of the car upon the car lift, upon a work bench in front of the car lift and in a side room right of the Box location. The cart trolley can be found in the diner, most commonly behind the counter and behind a seat near the back of the diner near the Roof Hatch. - NAV table part 3 - The radio is located on top of the filing cabinet in the Garage ( The player must jump to grab the part).
- Turbine Door - Shed past the diner and repair shop with lamp post out front. Possible bus part
inside. - Box location - Inside the repair shop. The box will always spawn here first.
- An old view of the diner can be seen through the reflection of a sniper rifle scope from before the
events of moon, full of people and a fully lit neon sign.
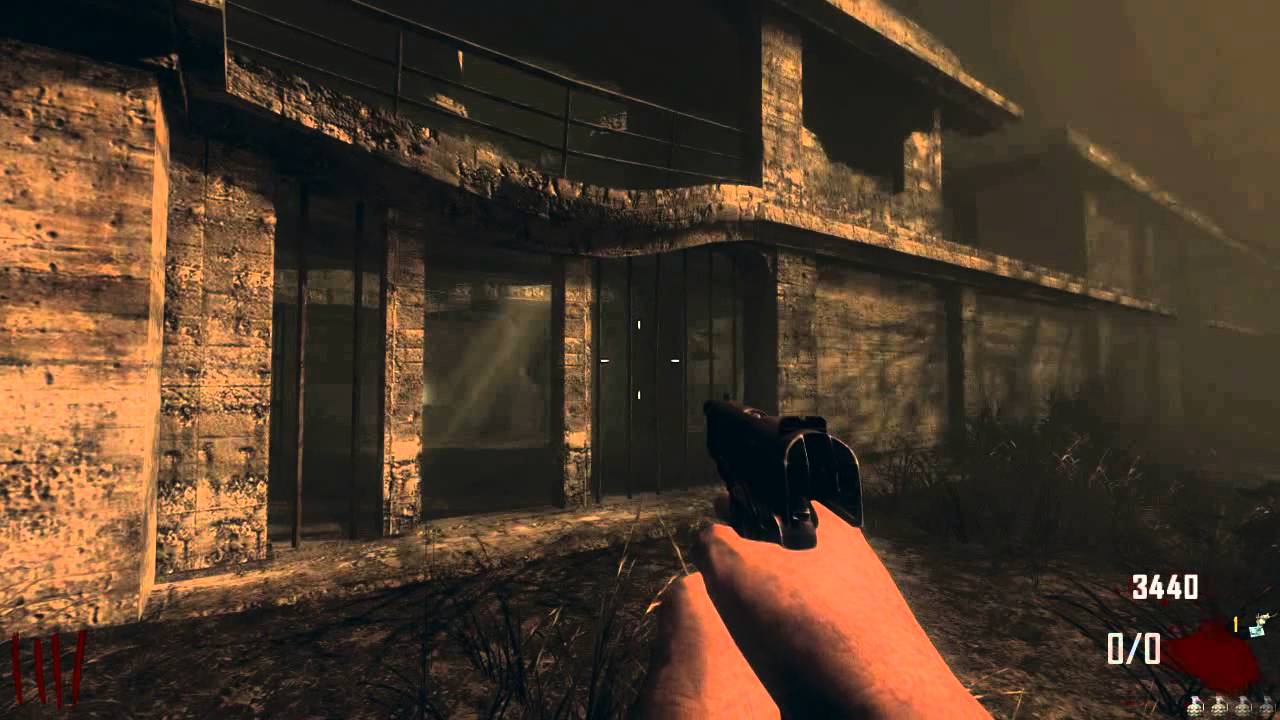
Farm

- Remington 870 MCS - Inside the barn. Behind the crate to the player's left as they enter through
the main doorway, before going up the stairs. - Turbine Door - Shed at the back of the farm, in front of the truck. Claymores are on the back wall of
the shed, as well as a possible bus part. - Turret - Built in the bottom front room of the farm house. Parts: Lawn mower, rifle barrel, and ammo
pouch. - Double Tap Root Beer - Perk machine on upper floor of the barn.
- The Fridge - Located on the lower floor of the farmhouse, the fridge allows a player to store their
current weapon for a later time. The stored weapon will remain through subsequent playthroughs,
until the player removes the weapon. The only weapons that cannot be stored are the Ray Gun and the Ballistic Knife (this includes both their upgraded variants), as well as the starting M1911 pistol (its upgraded version can be stored however). However if you store an Rocket Propelled Greivance (upgraded rocket launcher) in the fridge on
Die Rise and then leave the game and open it on TranZit, an Krauss Refibulator (upgraded ballistic knives) with galvaknuckles will appear instead. - Box location - On the balcony of the farmhouse.
- NAV Table part 4 - Power box next to the fridge on the wall. If it is not there it will be located in town.
- Teddy bear location - Top floor of the house that needs 750 points to open. Lying down on a
mattress. - On survival mode for this room, if you go to the fence gate with a sniper rifle at a certain angle
you can see the farm before it was destroyed through the events of moon, the same can be
done in TranZit.
Power Pylon
- The NAVcard Reader can be built in the back against the fence directly under the pylon.
Note: The bus does not stop by this location, as it is not a destination.
Nacht Der Untoten (Prototype)
- Jet Gun part - Handle located on top of one of the tables.
- NAV Table Part 5 - Radio Box located in one of the fallen shelves
Note: The bus does not stop by this location, as it is not a destination.
Power Station
- AK-74u - On the left side of the shack that leads to the underground power facility.
- Tombstone Soda - On the way out of the power building, on the left before dropping down to the
road. - Electric Trap - Built on the workbench at the top of the stairs behind the door requiring a Turbine or
the to power be on. Parts: Car battery, metal plate/rod, TV glass. - Jet Gun - The cables are located in the same area where the Electric Trap parts are scattered.
- NAV table part 1 - The board will be located by jumping down left of the Tombstone perk, walking
over the broken bridge and to the right by the barrels will be the part (It is quite hard to notice). If it is not there, it will be in the tunnel. - Pack-a-Punch access plate - Located behind where the player drops into the power station (by the door next to the AK-74u, drop down, turn around). The plate has a white lightning bolt with a green background on it. A Turbine must be placed near this panel to open the corresponding door in the bank in Town, to access the Pack-a-Punch Machine.
Hunter's Cabin
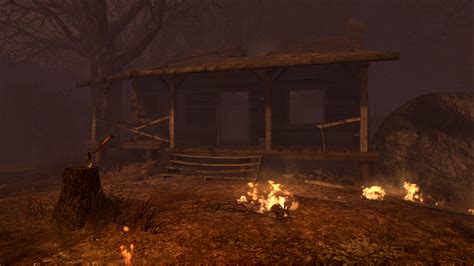
- Bowie Knife - Inside the cabin near back door.
- Jet Gun part (Pressure gauge) - On the bed, near the fireplace or in a fallen chair.
Note: The bus does not stop by this location, as it is not a destination.
Town
- Turbine Door - In the back of Town heading straight from where the bus arrives, on the right.
- Semtex grenades on left wall inside. Possible bus part.
- Thrustodyne Aeronautics Model 23 (Jet Gun) build table - In the bar next to the Stamin-Up Perk-a-
Cola machine. - Pack-a-Punch Machine - Under the bank. Accessed through the two safe doors (opened using explosive splash damage), and the door with the lightning bolt, which is opened by putting a Turbine in front of the panel at the power station with the same lightning bolt on it.
Note: It is possible solo. Make a crawler inside the power station building close to the Electric Trap table, place the turbine at the door with the lightning bolt, and either run to the bank or take the bus. The player must then get to the bank as fast as possible. While under the bank in the underground lab, the player must stay in the PAP tunnel or the door will shut and must be reopened. - Bank - Where players can deposit and later, withdraw points. Points stay in bank even when the
player leaves and joins another game. - Juggernog Perk-a-Cola machine in the building on the left following the bus route out of Town.
- Stamin-Up Perk-a-Cola machine on the ground floor of the bar.
- Bottom Drawer - When entering the bank from the bus side, hug the right side, and look down on the left. You will see two keys in a drawer, low to the ground. See "sharing points" for more depth.
- NAV table Part 4 - In the back alley across from the turbine door, it is the power box and it would be leaning up against the dumpster next to the random box location. If it is not located here it will be in Farm.
- Teddy bear location - On one of the booths at the bar.
Bus
B23R - On the ceiling of the bus, towards the back.
--------------------------------------------------------------------------------------------------------------------------------------
The Avogadro

--------------------------------------------------------------------------------------------------------------------------------------
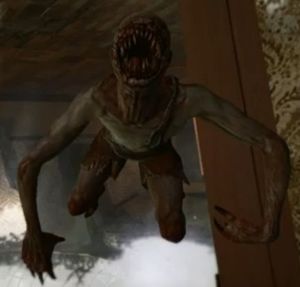
Denziens
The Denizens have low health, and can be killed before they leap on a player. Their health when leaping does scale with that of the Zombies, at the same rate. When attached, the Denizen takes five knife attacks before it lets go, however it will be reduced to two hits with the Galvaknuckles or three with the Bowie Knife. It can be melee attacked or shot before latching if the player responds quickly enough, taking one well-timed attack from the Bowie Knife or Galvaknuckles or two rapid knife attacks to prevent it even getting on to the player. If a Denizen leaps on a player, they will not hurt the player directly like zombies but will instantly down the player if not meleed off in a small amount of time; having Juggernog does not extend this time. They can be killed by either another player shooting it or by hitting the melee button. A player with a Denizen mounted on them can still walk and evade zombies. Once jumped upon, the player will move slower and Stamin-Up's effect does not apply. If the player is on top of the bus, they will not attack, but objects in some different locations will knock the player off the bus if the player is not cautious. Like regular zombies, they are affected by Insta-Kill.
Behavior
If a player steps out into the fog between bus stops, a Denizen will emerge from the ground, and start shrieking. They do not have an infinite range to leap on a player, and will attempt to run after the player before getting in range to jump on them. It has been noted that a Denizen will run back into the mist if the player returns to the clear air around the locations, also the Denizens will not go after Monkey Bombs; however, a Denizen will not be affected by the lack of fog if the player leaves the fog while it is leaping to them, thus allowing streetlights to be used to make portals. If a player with a Denizen latched onto their head runs under a green street light, the Denizen will jump off the player, and start to dig a hole underneath the streetlight. Once the Denizen is completely submerged under dirt, a portal will appear under the streetlight. The player can then jump through the portal and end up in a random location around the map so long as that location is under a different streetlight.
Denizens will always run away when near a streetlight that is turned on, and the characters will often make remarks upon their strange behavior. Denizens are very vulnerable until they catch a player. With the Galvaknuckles or Bowie Knife, they can be killed in one hit as they are leaping, done by turning in their direction as they make their unique leaping scream and meleeing when they get close. It is also to be noted that a player can kill a Denizen with one hit while using the Bowie Knife or two hits with the default knife before they land on one's head. A trick to using the Bowie Knife on them is to not turn around; an experienced player that can guess fairly accurately the second before a Denizen will land on their head can swing their Bowie Knife without turning around and will kill them before they land on a players head.
Their leap is fairly slow and they can be hit from a distance beyond the standard melee range. The main purpose of the Denizen is to prevent players from leaving the parameters of the separate maps as opposed to an invisible wall, therefore they only appear when one goes too far into the fog. Denizens do not attack the player if they are on the bus roof, but the instant they are knocked off or step into the fog, they will attack. Denizens do not attack underneath the tower. Interestingly, only one Denizen will attack the player at a time, and only two Denizens can physically exist on the map at any one time.
Denizens can be caught on fire should they run through a lava pit or crack. These flaming Denizens will also explode upon death in an identical way to a flaming zombie, doing damage.
-----------------------------------------------------------------------------------------------------------------------------------
The Jet Gun

The Thrustodyne Aeronautics Model 23, also called the Jet Gun, is a buildable Wonder Weapon that first appears in the Zombies exploration mode TranZit. It is made out of a jet turbine, spool of wire, a gauge and a motorcycle handbrake. It works by sucking zombies towards it and then gibbing them in its rotors, and can even kill zombies located behind the player. The Jet Gun, however, can be broken, unlike other Wonder Weapons. The left dial on the Jet Gun determines when it will break. When the pointer reaches the complete other side in the red section, the weapon will break. However, when the Jet Gun is held out and not fired, the pointer will slowly move back towards the left, allowing it to be used more.
Once the weapon breaks, the player using it will receive a minimal amount of damage from the resulting explosion, and the parts will be scattered around the player; if any part falls into the lava, it will return to the place where it was originally found. But if any part is ran over by the bus, it will disappear completely and will not return to the place it was originally found. Instead it can not be found for the remainder of the game. The Jet Gun arguably being one of the worst wonder weapons is an extremely common perspective amongst the community. This is perhaps due to the low mobility it imposes, it taking a while to actually kill the zombies, the time taken to build, and the slow recharge rate.
Part Locations
- Jet Engine: found in the Tunnel.
- Near the first window on the left.
- Beside a car near the railing of the Colt M16A1.
- Between the first window on the right and Colt M16A1.
- Between the cars to the left as you enter the encampment.
- Wires: found in the same room as Tombstone Soda, only after the power comes on and Maxis finishes talking, the wires are almost on the same places as the parts of the Portable Electric
Barrier can be found. - On the lower floor near the collapsed cat walk on the electric box.
- On the lower floor near the collapsed bridge on the ground.
- Near the Tombstone Soda.
- On the lower floor in the small room with the window on a barrel.
- Handbrake: found in Nacht der Untoten.
- Near the lamp.
- In one of the cabinets.
- On the stairway, on the right side behind the desk.
- Pressure Gauge: found in the Hunter's Cabin.
- Near the fireplace.
- On the bed near the back door.
Stats:
- Damage: ∞/Zero (Shoots at 400+ RPM in order to kill zombies. Any below 400 will do nothing)
- Magazine Size: None (Lasts for 15 seconds of continuous firing before breaking)
- Starting Ammo: None
- Reload Time: None (Takes approximately 1 minute, 40 seconds for a full cooldown)
- Recoil: Very low
- Fire Mode: Automatic
-----------------------------------------------------------------------------------------------------------------------------------
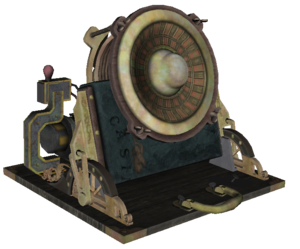
Turbine
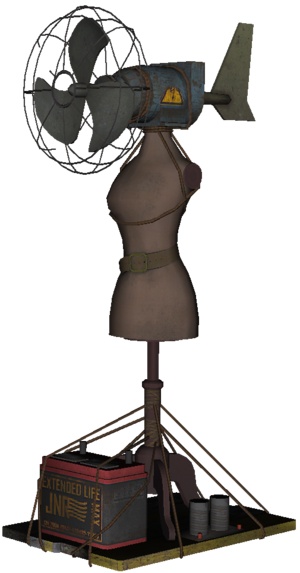
The Turbine is guaranteed to be able to build in the starting room of Green Run, with all three pieces spawning in the starting room. It can only be crafted at the workbench in the starting room.
The Turbine's uses are as follows:
- Opening certain doors.
- Powering up Perk-a-Cola machines prior to the power being turned on.
- Powering up streetlights prior to the power being turned on.
- Providing power to the buildables Electric Trap and Turret.
- Powering the door at the Power Station that opens the way to the room containing the Pack-a-Punch Machine.
- Restarting the Bus after an EMP Grenade or the Avogadro disables it.
- Providing power to the Subsurface Resonator in Buried.
Part Locations
- The Mannequin
In Tranzit, this piece spawns up against the triangular map in the starting room, and in Buried it is in the back right corner, in the back room, on the main floor of the general store. - The Mannequin's location.
- The Fan
In Tranzit, the Fan spawns on a seat opposite the crafting bench, and in Buried, it is located in the back room, on the second floor, to the immediate right, on a desk. - The Fan's location.
- The Tail
The most obscure of the three pieces, in Tranzit, the Tail spawns to the right of the bookcase in the starting room, on the floor. It is behind the Mannequin's spawn point, next to the M14. In Buried, it is located on the set of shelves on the far left, on the main floor of the general store, when entering through the front door. - The Tail's location.


-----------------------------------------------------------------------------------------------------------------------------------
Zombie Shield (TranZit)

When using the shield, it does not generate any points for kills because it is a buildable. When it does not kill a zombie upon the first hit, it will give the player 10 points per zombie that was hit but not killed. It will kill a zombie with a single hit up until round 20, when it will take multiple bashes to send zombies flying. The shield will block zombies' attacks completely, even when on the player's back. However, the shield will only sustain 15 hits after which it will break. The shield can be planted to distract zombies. The Zombie Shield will also deflect explosive damage dealt by the player without penalty.
Stats
- Damage: 2500
- Weapon Class: Equipment
Part Locations
- Car Door: In the garage.
- On the floor in the bathroom next to the sink
- In the car on the maintenance platform.
- On the table in the garage, next to the room with the crafting bench
- Hand Trolley: In the diner.
- Behind the counter on the left or right side.
- Near a booth at the far end from the Speed Cola.
-----------------------------------------------------------------------------------------------------------------------------------
Turret

Parts
- Unusable RPD: Found on the top floor of the barn near Double Tap Root Beer or on a sofa on the top floor in the building with the building table.
- Ammo bag: Found in the bottom floor of the house near the building table.
- Lawn mower: Found near the shed between the two doors.
--------------------------------------------------------------------------------------------------------------------------------------
Sharing Points
Another major feature is the ability to share points in TranZit. To do this, a player must find a drawer with tags such as the one inside the bank vault. They then have to hit it with the Galvaknuckles or pack-a-punch Ballistic Knife After doing this, the player can deposit 1100 points in the safe, which will cause a 1000 points power-up to drop, which any other player will be able to pick it up. The orb looks like a point drop from Dead Ops Arcade or the bonus drop by the QED from Moon.
If a player is standing where the drop will appear when a player deposits 1100 points, the money will be lost and no-one will get it.
--------------------------------------------------------------------------------------------------------------------------------------
Easter Eggs
- A musical easter egg is activated much like the previous songs; finding and hitting the action button on three Teddy Bears around the map. If they are pressed in order the song "Carrion", sung by Clark S. Nova will play.
- The first one is outside the starting room, on a wooden bench, near a pool of lava.
- The second can be found in the Farmhouse, on a mattress in the second floor of the house.
- The third one can be found on a cushioned chair, in the bar, next to the billiards table in Town.
- The story easter egg, Tower of Babble, can only be performed on TranZit. There are two paths to the easter egg: Dr. Maxis', which requires turning the power off, and Richtofen's, in which the power is kept on, but the player must be playing as Samuel J. Stuhlinger to be able to hear Richtofen's instructions.
- Another easter egg is a spot near the farm, in the depths of the corn field. Walking through a few cuts through this field ends at Nacht Der Untoten, the first Zombies map from Call of Duty: World at War.
- An old TV set in the Cottage of the Farm Area will play radio messages if the action button is
pressed on it. - Anywhere in the map, if the player looks at the reflection in a sniper scope (such as the DSR 50),
they can see the area as it was before the events of Moon. - At the Diner if you look at the sign it spells out NOW DIE
The Tower of Babble (TranZit Main Easter Egg)

IF THERE IS WRITING IN THIS SECTION ABOVE THIS BOLDED TEXT DUE TO A GLITCH THIS SECTION STARTS HERE. IF THIS TEXT ISNT BOLDED SCROLL DOWN
There are two ways of completing this Easter Egg, both of them must be done in the Original difficulty setting. One way is by listening to Dr. Maxis, and can be done only when the power on the map is turned off. The other way is by listening to Richtofen while the power is turned on, however the only character that can hear Richtofen is Samuel and does not work if Samuel is not in the game. This method does not require the NAV table to be built, as it has been completed without it, but the Thrustodyne Aeronautics Model 23, must be built in order to complete it, which Richtofen makes comments of having to be built after the power is turned on.
Once a player has completed one side of the Easter Egg, it will count as having been completed for that side in all subsequent playthroughs. In order to do one side of the Easter Egg a second time, the player will need to have completed the other side first, which will in turn lock that side, or have activated the endgame on Buried, which will unlock the Easter Egg so that either side may be completed. Alternatively, the player may join a game in progress so long as none of the players that started the game have the desired side locked.
The canon ending is confirmed to be Maxis' side of the quest in the official Zombies Timeline.
Step 1
The Power Lab must be accessed by getting off the bus at the Power Station, near a lamp post and teleporting, or by simply running through the fog. Once at the Power Station, the Power Lab is accessed by opening the door to the outhouse where a secret entrance can be found
Step 2
There are three parts to build the switch to turn on the power. One is a circuit, another is a severed arm, and the last is the lever. They are all scattered in this area; collect these parts and assemble a power switch at the blueprint. Then, turn on the power. The lever can be found in the mystery box area on the computer desktops, or it can be by the boxes in the circle at the entrance. The arm can be found by the boxes or when going up the steps into mystery box. The fuse box can be found by the barrier where the player enters, down the first set of stairs, or leaning against a desktop in the mystery box room.
Dr. Maxis' Path
Step 3
At least two players must acquire a Turbine. The pieces for it can be found in the Bus Depot, where the game starts.
Step 4
After turning the power on, Dr. Maxis will request the power to be turned off. This must be done after he finishes his entire speech.
Step 5 (optional)
At least one player should obtain the EMP Grenades from the Mystery Box.
Step 6
From the Farm, players must travel towards the Power Station area to see the large Electric Tower. In the cornfield on the left hand side of the road, there will be a Pylon. The cornfield is set up as a maze. After killing the last zombie while the lightning is directly above the player, the Avogadro will spawn. At this point, the players should place down two Turbines underneath the Pylon. Dr. Maxis will start talking as the Pylon charges up. When the Avogadro is directly underneath the tower, Dr. Maxis will say: "Finish him now." Players should then use the EMP grenade to kill him while under the Pylon. Alternatively, the Avogadro may be defeated by other means, but the EMP grenade is by far the easiest.
Step 7
Two players must now pick up their Turbines and go to two different street lamp locations on the map. The first location where Denizens do not attack the player is at the Bus Depot and the second is at the Diner. All four players should now place their Turbines at the same time; two under the Pylon and the other two at the street lamp and the achievement/trophy will be unlocked. (Note: This step can be completed before or after the steps involving the electricity pylon, but only after the power has been turned off.)
Richtofen's Path
Step 3
After turning on the power, the players need to assemble the Thrustodyne Aeronautics Model 23.(See "Jet Gun" for part locations)
Step 4
The players, preferably all of them, must go underneath the Power Pylon, located on the opposite side of the road of Nacht der Untoten after a small maze in the cornfield. The player with the Thrustodyne Aeronautics Model 23 should shoot it under the tower until it breaks, which is when Richtofen speaks to Samuel. The players now need to kill zombies under the tower. The players must kill zombies with explosives (the Ray Gun counts) until Richtofen speaks to Samuel about the power being too high. Note: Sometimes when playing multiplayer, Richtofen will yell at Samuel telling him the Pylon needs to be hot, even after firing the Jet Gun until it breaks. This can be fixed by having all players rebuild the Jet Gun again. However this can be very time consuming, especially if one does not know how to navigate through the fog. It's highly recommended to have a player that knows this step and warm up the Pylon under custom games by themselves, and then have everyone join, as this bug doesn't seem to occur when playing solo. Tip: When doing this solo, it is also recommended to restart the game until the player spawns as Samuel, as Samuel is the only character to tell if this step is done.
Step 5
A minimum of two players must obtain the EMP Grenade, but it is highly recommended for all four players to obtain them.
Step 6
Note: Every step before step 6 can be done solo. However a minimum of two people is needed to finish the last step.
At this point, four EMP Grenades should be thrown at four different green lamp posts. These lamp posts can be identified by the green light now emitting electricity and are found all over the map. With four players, this is easily done by everyone throwing their EMP Grenades simultaneously at the lamp posts. However, with two or three players, it becomes slightly more complicated. For one player to throw two EMP Grenades at two lamps, they need to get a Denizen to make a teleporter under the lamp post (done by walking up to the lamp with a Denizen on them), then throwing one EMP on the current position, quickly jumping through the teleporter, and then throwing the second EMP. This method requires teamwork, luck, and both of the two EMP Grenades available. When the EMP Grenades are succesfully thrown, Richtofen happily greets Samuel and the achievement/trophy should pop up.
-----------------------------------------------------------------------------------------------------------------------------------
About Die Rise

Die Rise occurs in post-apocalyptic China; the fight against the zombies takes place on two skyscrapers. The top half of the spawn building is broken off and wedged upside-down between the two skyscrapers, bridging the gap between them while effectively acting as a third building. It is also the first map in Zombies to introduce a true element of verticality, including broken elevator shafts, upside down skyscrapers, deadly falls, and elevators which transport randomized Perk-a-Cola machines and the Pack-a-Punch Machine up and down the floors. When jumping from building to building, mattresses are scattered throughout to prevent injury from the jumps. The map contains tighter corridors and long vertical drops, unlike any other Zombies maps.
The map features a new buildable wonder weapon (similarly to TranZit), the Sliquifier. A new buildable device is also featured, the Trample Steam, which has the capability to fling players and zombies alike. Die Rise also features a new enemy, the Jumping Jack, which looks and acts similarly to Crawler Zombies. They come every five to seven rounds, and can do short teleports around the environment. There are also zombies with stronger health, identifiable by their body armor. A new Perk-a-Cola is also introduced, Who's Who, which allows the player to revive themselves by taking control of a doppelganger (with only a M1911 and Claymores if purchased) nearby who can try to revive the real character. Through a patch, the Weapon Locker and Bank utilities from TranZit have both been added to the map. They can be found by going to the power room from the freight elevator, and jumping over the gap. The closest fridge in that room is the Weapon Locker. The two showers in the room are the Bank utilities.
Key Features of Die Rise
- PDW - 57 (Wall Weapon)
- Colt M16A1 (Wall Weapon)
- AN-94 (Wall Weapon)
- Sliquifer (Buildable Weapon)
- Who's Who (Unique Perk)
- Trample Steam (Bulidable)
- Perks (Quick Revive, Speed Cola, Double Tap Root Beer, Mule Kick, Jugernaut, Stamin-Up)
- Jumping Jacks (Zombie)
- Nav Table (Cross - Map Easter Egg)
Jumping Jacks
Trample Steam

Part Locations
- In Die Rise, all the parts are found in the starting room or in the room adjacent through the door.
- Chicken wire
In Die Rise it is found either to the left of the first purchasable door, or through the door against the wall to the left. - Motor
In Die Rise, it is found either on the lobby desk, or in the corner next to the collapsed stairwell. - Bellows
In Die Rise, it is found either halfway up the stair on the left side of the lobby, or straight ahead leaning against the wall to the right. - Flag
In Die Rise, it is found either next to a broken chair at the bottom of the right-side stairs in the spawn room or next to the top of the escalator, leaning against the rail.
Sliquifier

Unlike the Jet Gun, it is not used in the equipment slot, but rather as a weapon. If a player holding the Sliquifier goes down and dies, or trades it in for something else, it will become obtainable from the Mystery Box. Like regular weapons, if it runs out of ammo, it will still stay in the player's inventory and can be replenished via a Max Ammo drop.
The Sliquifier's shots cause splash damage, which can cause damage to the player and will stun them. However, the actual damage is very low, and will rarely be fatal except to the most heavily damaged of players.
Part Locations
- Note: All parts are located in the same building. Including the power, the player must buy one door. Clearing the debris blocking the staircase is optional, as the area above it is accessible by elevator.
- Mannequin Foot: Near the top of the staircase, next to the television. This part never moves.
Used as a stock. - Gas Canister: It is either next to where the Sliquifier is built in a green cage, or somewhere next to the power switch on a table. Used as a propellent.
- Handbrake: It is either in the power room on the tables by the elevators, or by the fridge near
where you build the Sliquifier. Used as the trigger and grip. - Wires and discs: It is either on the barrel next to where the debris was bought, or it is in the room upstairs with the showers and washing machines on a wooden stand. Used as the main body of the gun.
- Crafting Table: It is located in the room below the power room.
Who's Who

High Maintenance (Die Rise Main Easter Egg)

Completing one side of this Easter Egg will carry over into subsequent playthroughs, however the player will still be able to complete the other side freely so long as none of the other players that started the game have completed that side of the Easter Egg beforehand. Completing the other side of the Easter Egg will unlock the originally completed side for future playthroughs, however it will also lock the more recently completed side. In other words, one side of the Easter Egg may not be completed twice in a row. However, activating the endgame on Buried will reset all Easter Egg progress across that map, Die Rise, and TranZit, allowing the player to do either side as both will be unlocked as neither side will be considered to have been completed. Alternatively, the player may join a game in progress so long as none of the players who started the game have the desired side locked as the game does not lock the Easter Egg after the game has begun.
The canon ending is confirmed to be Maxis' side of the quest in the official Zombies Timeline
Step 1
Simply turn on the power to begin. Note that building the NAV table is required to start the Easter Egg or standing on the symbols may not work during the Easter Egg, and is required for the final ending Easter Egg which is on Buried.
Step 2
All four players must step on the four golden rings on top of four elevators. These locations do change from game to game. One spot it could be located is on the elevator that leads to the Bowie Knife or the one right next to it and is accessible from the power room. Another spot it could be is on the elevator near the Remington 870 MCS. Another spot it could be is either on top of the Quick Revive elevator or the other elevator next to Quick Revive, both elevators are adjacent to where the player builds the Trample Steam. Another spot it could be is the elevator next to the SVU-AS, and the last, but not least, spot it could be is on the elevator in the corner on the roof near where a Mystery Box spawn location is (referred to by people as "No Man's Land" or "Dead Man's Corner"). All four players must step on them simultaneously. Care should be taken that the elevators do not kill the player if standing on them while they are near the top floor. Once done, Richtofen and Maxis will speak to the player.
Step 3
Match the gold symbols on the floor. There is one by the M14, one above the AK-74u, one on the roof to the left of the Semtex Grenades, and the last is past the SVU-AS by the cafeteria. They are the same symbols as the elevator symbols. They must be lit up by stepping on them in sequential order. This order changes per game, so it is mostly guessing and trying different combinations. Once all four are lit up, Richtofen and Maxis will speak to the player.
Step 4
Acquire any sniper rifle and look into the dragons' mouths. There should be a small ball in each mouth. If the player shoots both balls out of both dragons' mouths, they should teleport under the lions' paws in the starting room, adjacent to the Olympia
Richtofen's Path
Step 5
Acquire any sniper rifle and look into the dragons' mouths. There should be a small ball in each mouth. If the player shoots both balls out of both dragons' mouths, they should teleport under the lions' paws in the starting room, adjacent to the Olympia
Step 6
Scattered throughout the map are golden zombie symbols with circles outlining them around the map, one near the spawn by the M14, two near the Claymores on the roof with the NAV table, and one near the Semtex on the same roof. Each player will need to place a Trample Steam on the symbols so that they face the radio tower on the roof. Once all four have been placed down, allow zombies to be killed by the Trample Steams. It is advised that the player does not clear the couch debris blocking the escalator near the M14 so that zombies can only come from one way and the other way blocked by the Trample Steam. Richtofen will indicate that the step is completed by asking Samuel to use the Galvaknuckles. However, any player can use them. Each zombie symbol will give a quote from Richtofen if the Trample Steams are placed correctly; the player needs to make sure that they have heard all four or they will not be able to move on.
Step 7
There are Mahjong tiles of different colors and sizes located throughout the map. These tiles indicate the order in which the player should melee the radio tower with the Galvaknuckles (see step eight). There are eight tiles, but there are eleven locations for the tiles to spawn. Each time the player does this step, it changes order from game to game so it will not be the same each game.
Four of the tiles have Chinese Mahjong symbols, which indicate a compass ordinal. The other four tiles are color coded with the directional tiles have indicate the order in which that particular post should be hit. Each compass point and dot tile is colored, and same-colored ones are correlated. The colors are red, blue, green, and black. For example, if the player finds a green "north" and green three dots, the north side of the tower is hit third. This order changes every match.
Note: These tiles can be found at any point in the game as the order does not change at any point.
The potential location of these tiles is as follows:
One corner of the tower will have the direction that corresponds with that corner.
In the spawn room on the same desk the compressor for the Trample Steam sometimes spawns on.
- At the bottom of the escalator near the M14.
- On the broken stairs that lead to the SVU-AS from the spawn.
- On the couch with four circular cushions near the initial Mystery Box spawn.
- On the last level of the elevator shaft that the player can stand on above the AN-94.
- The Buddha room (after the AN-94 room) on the top level at the back of the room to the right.
- On a shelf, near the Sliquifier next to a soda can and a basket.
- On a table with a sewing machine in the power room.
- On a lawn chair near the Mystery Box spawn on the roof.
- In the kitchen near the MP5.
Step 8
Once the order is determined, the player must melee the bars with the Galvaknuckles in that order. North faces the Trample Steam room and West faces the sun. Figuring out South and East are just opposites. The radio tower will have a surge of electricity hit it and lighting up blue, with all of the dragon's flares sparking, and the achievement/trophy will be unlocked the first time through.
Alternatively, trial and error can be used due to the order not changing. However, this is not recommended as this step can only be attempted once per round. Should the player make a mistake, the tower will cease to glow until the round ends.
This is then the completion of Richtofen's side of the High Maintenance Easter Egg.
Maxis' Path
Step 5
Note: Stuhlinger and Russman cannot pick up the balls, even if they place them back. If they do, the players will later on not get a necessary prompt, making the Easter Egg impossible to complete.
Marlton and Misty need to remove both of the balls from under the lion's paws. When the balls are picked up, there will be no indication that the player has them or not; for example, if a player has it and they get downed and they don't know if they still have it or not, the ball will spawn back at where it was before.
High Maintence (Die Rise Main Easter Egg) (Continued)
Step 6
Kill zombies in the direct center of the Buddha room, Maxis will say to the players, "Reincarnation will reveal its way forward" when the player has killed a satisfactory amount of zombies
Step 7
A player must acquire the Ballistic Knife from the Mystery Box and Pack-a-Punch it into the Krauss Refibrillator. Then, the players must go back into the Buddha room and shoot the Krauss Refibrillator at a downed player in the Buddha room. It is recommended that the downed player buys Who's Who prior to getting downed so that they will keep their other perks if they had any. Afterwards, it is possible to hear Maxis talk to the player, provided the player killed enough zombies.
Step 8
The players must now build the Trample Steam and place one on each of the four lion symbols on the ground. The players must then drop the balls acquired earlier on top of the Trample Steam; the balls will bounce to each of the Trample Steams, get flung onto the radio tower, and an orange surge will go through the radio tower. As said at Step 5, the glitch will occur if either Russman, Stuhlinger, or both pick up the balls, and the game will not prompt the player to place the ball on the Trample Steams, even if the player places the ball back at the lion's paw, allowing players playing as Misty and Marlton to pick it up. After this is done, a player must now obtain the Galvaknuckles and go around the map looking for the Mahjong tiles, similarly to Richtofen's side. See Richtofen's side for help.
Step 9
Once a player has obtained the Galvaknuckles, they must then go to the radio tower, and after a short time, the four posts of the tower will be lit up. The player must then punch the tower in the order stated by the Mahjong tiles. Once the stands of the tower have been hit in the correct order, the radio tower will have a surge of electricity hit it lighting up orange, with all of the dragon's flares sparking, and the achievement will be unlocked. The trial and error method also works for this side, but it is not recommended for the reason stated above.
This is then the completion of Maxis' partition of the High Maintenance Easter Egg.
Reward
Once the players have completed either side of the Easter Egg, each player will receive all six available perks in Die Rise.
Easter Eggs
- The musical Easter egg for Die Rise is "We All Fall Down" by Kevin Sherwood, activated by finding three teddy bears scattered across the map. The first teddy is near the SVU-AS. The 2nd teddy is near the edge of the upside down Buddha room. The 3rd teddy bear is near the Power Switch on the back right corner in the power room.
- The Perk PHD Flopper is seen in Die Rise but it is a Unobtainable Easter Egg. But is can been seen when going down the falling elevator.
About Mob of the Dead

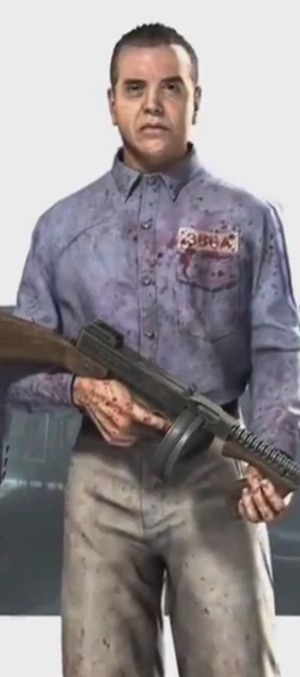
Mob of the Dead occurs within the infamous Alcatraz Island and includes the Golden Gate Bridge; the juncture of the map is set during the Prohibition-era of America. The four playable characters are Finn O'Leary, Albert Arlington, Salvatore DeLuca, and Billy Handsome. These mobsters are inmates of Alcatraz and attempt to execute an escape plan during the night of the zombie outbreak.
This map introduces a new game mechanic, Afterlife Mode. A player in Afterlife can power various utilities and walk through certain walls to reach areas that are not normally accessible; however, the duration of the Afterlife is limited. Afterlife is necessary for collecting the plane components that are dispersed across the map. Mob of the Dead also features a new boss-like zombie, Brutus. He attacks players and also targets various utilities to disable, including Perk-a-Cola machines, workbenches, traps, and the Mystery Box.
The map features a number of buildables, including the returning Zombie Shield and the new Acid Gat Kit and Icarus. Any of the numerous workbenches found around the map may be used to craft these buildables, with the exception of Icarus, which must be built on the roof of the prison.
The map also features a new Perk-a-Cola called Electric Cherry, which creates an electric barrier around the player during a reload. Depending on the round, the electric shock can either stun zombies, or kill them.
There are three musical Easter eggs currently found; "Rusty Cage" by Johnny Cash, "Where Are We Going" by Malukah, and "Samantha's Lullaby" by Kevin Sherwood.
Key Features of MOTD
- Uzi (Wall Weapon)
- AK-47 (Box Weapon)
- Death Machine (Box Weapon)
- LSAT (Box Weapon)
- M1927 "Tommy Gun" (Wall Weapon)
- Blundergat (Box Weapon)
- Hell's Retriever (Tactical Equipment)
- Golden Spork (Melee Weapon)
- Afterlife Mode
- Fan Trap
- Acid Trap
- Tower Trap
- Mystery Box Reskin
- Gondola
- The Warden "Brutus" (Boss)
- Plane (Buildable)
- Acid Gat Kit (Buildable)
- Zombie Shield (Buildable)
- Perks(Juggernaut, Double Tap Root Beer, Speed Cola, Electric Cherry, Deadshot Daquri)

The Characters
the four playable characters are Michael "Finn" O'Leary, Albert "Weasel" Arlington, Salvatore DeLuca, and Billy Handsome, all of whom are gangsters who have been locked up on Alcatraz and were planning an escape on the night of the outbreak.


Hell's Retriever

The locations of the three Cerberus' heads are as follows:
- In the 'Broadway' cell block, located near the B23R.
- In the infirmary adjacent to the Afterlife power box.
- Near the workbench on the lower level of the docks.
Once the three Cerberus' heads have receded into the wall, and the Cerberus' head icon on the wall is glowing, an area will open up beneath the sign of the three dog heads down in the Citadel Tunnels. In this room will be the Hell's Retriever, waiting to be picked up.
When thrown, it can pierce through a total of six zombies at once, eventually returning to the player. It can also be charged, which adds more damage and distance. This can be done by holding down the tactical button for a maximum of two pulses. If the player throws it towards a power-up, it will retrieve the power-up and bring it back to the player.
Players will lose the Hell's Retriever if they bleed out. Throwing it does not get rid of it, as it simply returns to the player (the only exception being the step 3 of upgrading to Hell's Redeemer), although it takes a while for it to return to them. Additionally, the player has to wait for the five second cooldown before it can be thrown again. The Hell's Retriever has the ability to kill zombies instantly (if charged twice) until round 20. It is also very effective when fighting Brutus.
How to upgrade into Hell's Redeemer

The Hell's Retriever can be upgraded into the Hell's Redeemer by completing a series of tasks. As long as it is charged once, it is an instant kill weapon, except on Brutus if he still has his helmet on. In addition, it can be charged three times as opposed to only twice with the Hell's Retriever, however, it still retains the ability to kill a maximum of six zombies at once. The Hell's Redeemer is
only obtainable in Original difficulty.
Steps to obtain the Hell's Redeemer
- After obtaining the regular Hell's Retriever, kill approximately ten to fifteen zombies with the Hell's Retriever. When done, the sound of entering Afterlife and some music should be heard.
- Spend at least a round using only the Hell's Retriever on the Golden Gate Bridge, killing at least 30 zombies within that round. Once done, the player should hear the Afterlife sound when the round is finished. The player should not shoot weapons as this will restart this step. Knifing the air, however, will not.
- Throw the Hell's Retriever into the lava pit underneath Cerberus' head near the B23R. If done correctly, the Hell's Retriever will not be returned to the player and the Afterlife sound will be heard once again. As a side-note, there is an easy access to the lava pit. This is under the ramp that leads to the B23R/Cerberus' head. It's easier to throw the retriever to the lava here.
- On any following round, travel to the Citadel Tunnels where the Hell's Retriever is obtained. If previous steps have been done correctly, the Hell's Retriever should be absent and the aura should be blue rather than red. The Hell's Redeemer can now be picked up in Afterlife.
In co-op, every player can obtain the Hell's Redeemer, but each player has to do the steps themselves. However, multiple players can do the steps simultaneously.
Zombie Shield (MOTD)

- Hand trolley: Outside on the docks near some crates.
- Clamp: In the generator room
- Across from the generator that doesn't break
- Next to a generator in the corner of the room.
- On a table in the middle of the room.
- In the back left corner of the room near the fallen lamp.
- Can be in the back right corner next to the Generator.
NOTE - The clamp may be missing from time to time in solo play.
- Cell door: In the Citadel Tunnels
- Leaning against a panel on the spiral staircase.
- In the room where the plane part elevator descends to.
- The end of the hall near the generator room.
Acid Gat Kit
This buildable is only compatible with the Blundergat and upgrades it into the Acid Gat. It will shoot acid that sticks on surfaces which explode. It can be Pack-a-Punched into the Vitriolic Withering, which shoots acid and attracts zombies
Part Locations
- Motor : It can be found somewhere on the floor in the Warden's Office.
- The first location is near the Uzi leaning up against the wall.
- The next possible location will be to the left of the mystery box in the Warden's Office
- The last possible location will be to the left of the fireplace in the Warden's Office.
- Case: It can be found in the cell block.
- The first location is on top of a desk just outside the spawn by a jail cell.
- The next possible location will be near the Afterlife box near the cafeteria.
- The last possible location will be under the stairs in the hallway to the Warden's Office leading up to the B23R.
- Acid Bottle: It can be found in the infirmary.
- The first location is on top of a wooden table near a bloody bathtub.
- The next possible location will be on the floor in the corner of the room with two bathtubs full of blood.
- The last possible location will be on top of a trolley in the hallway of doors.
Electric Cherry

Contrary to popular belief, the radius of the electric shockwave does not increase cumulatively every time the player reloads; instead, the radius of the shockwave is determined by how many rounds the player has in their magazine. For example, expending the whole magazine will give the maximum shockwave radius and expending only one round from a large magazine will have very minor effects. It is worth noting that since the Blundergat and its upgraded variants (Acid Gat, Vitriolic Withering) only fire one shot or burst at a time, it will always produce a shockwave of maximum effect when using Electric Cherry, making the Perk-a-Cola valuable to have. Also, if the player who bought Electric Cherry goes down, they emit a shockwave blast around the character, stunning all zombies around them for a short time.
In addition, the perk cannot be reload spammed, so if a player stops reloading, and then restarts, they will not receive the effects of Electric Cherry until they fully reload and fire some of their ammo.
Golden Spork

In order to obtain it, the player must do a series of tasks.
Prerequisites
- Visit the Golden Gate Bridge at least once.
- Must be playing on Original difficulty.
- Requires Hell's Retriever
- Requires Acid Gat or Vitriolic Withering
Step 1
Find the jail cell with a blue and green movie poster hanging on the wall near the Warden's Office. Throwing the Hell's Retriever at the poster will remove it, revealing a hole in the wall.
Step 2
Enter Afterlife Mode. There is a portal entrance at the end of the row of cells near the Warden's Office. Enter the portal and zap a spoon lying on the floor to the right of a large crack with a skull in it. When performed correctly, the player will hear the Demonic Announcer laugh.
Step 3

Between this and the next step, the player is given a silver spoon as a melee weapon. This spoon is roughly as strong as Galvaknuckles.
Step 4
Enter the infirmary and locate the lone bathtub filled with blood opposite a Mystery Box spawn. Hold the action button when next to the bathtub. A silver spoon will appear and stir the blood. (This step must be completed for each player who wishes to obtain the Golden Spork.)
Step 5
Enter the underground showers and kill zombies using the Acid Gat or Vitriolic Withering. When the correct amount of zombies have been killed (about 50-70 kills), the Demonic Announcer's laugh will be heard once again.
Step 6
Re-enter the infirmary and return to the lone bathtub filled with blood. Hold the action button and a zombified hand will raise out of the blood grasping the Golden Spork. Press the action button to take the Spork, and it will be removed from the hand. (Note: This step must be completed for each player who wishes to obtain the Golden Spork.)
If a player bleeds out and respawns after obtaining the Golden Spork, they must re-complete steps 3 and 4. The Golden Spork will again rise into the zombified hand, and the player can retake it.
Afterlife
Afterlife is an astral projection game mechanic exclusive to Mob of the Dead. It allows the player to activate certain objects that need electricity, such as Perk-a-Cola machines and some gates.
Afterlife can be accessed via pressing the 'use' button at a high voltage panel, or by dying through normal means (however, the latter will result in any perks being lost). The player can move much faster in Afterlife and jump further and higher, and zombies will not attack the player unless right next to them. The player can also go through doorways only seen in Afterlife and use a short-ranged shock attack to activate Voltmeters to activate objects, as well as shock zombies to teleport them a small distance away. Players leave Afterlife by being revived, whether by themselves or another living player. The player's time in Afterlife is limited, however, and there is a limit of them available. In solo, the player starts with and is capped to three Afterlives, and in custom games, every player starts with and is capped to one Afterlife. At the end of each round, players are returned one Afterlife. If the player is not revived before the time runs out, they will return to their body in the usual downed state. Other players in Afterlife will have the Afterlife symbol above their character, as opposed to their "spirit". Other players appear as a "white mist" when in the Afterlife.
As long as nothing happens or is done to make the Afterlife meter deplete faster, Afterlife lasts roughly for one minute. Moving, sprinting, jumping, using the shock attack and being attacked by zombies will consume it faster, at different rates. Being revived will stop the meter from depleting, which can be used to significantly prolong the time left if there is another player free to repeatedly chain revives and never finishing.
When in Afterlife, the player's points, weapons and perks are temporarily removed and are given back when returning to normal state (except for perks if the player went down via damage). A player in Afterlife will thus not receive benefits from power-ups such Nuke or Max Ammo.
The Plane "Icarus"
Icarus can be built on the roof of Alcatraz, and consists of five separate parts located around the penitentiary. To get the parts the players must get the Warden's Key, as it is required for every part. In solo, the player can carry all five items at the same time, but with two or more people, one player is permitted to one part at a time.
The uniforms can be found in the shower rooms, below the cafeteria. The player must open the gate to the laundry machine with the key, then go into Afterlife and shock a voltmeter opposite of the machine. The laundry machine must then be activated, and this will trigger more zombies, and Brutus (depending on if and when he spawned last), to spawn (regardless of round and how many there were originally left) and thick fog to appear. You are unable to leave the basement room during this time. Eventually, the laundry is ready and the uniforms can be picked up.
The rigging can be found in the spiral staircase in the citadel tunnels. The player must open a small gate to unlock the electric number pad with the key, then go to Afterlife on top of the staircase. As the player floats down to the numbers pad, three numbers will appear on the walls to form a code. The number pad must be shocked to change the numbers to match the gate. Once this is done, the player should hear a small alarm, and a 60-second timer will start to count down. The door next to the numbers pad must be opened, and the rigging can be obtained from the elevator in the lower room during this time.
The engine can be found in the Warden's Office, in a room protected by electrified door. To disable it, the three generators located in a room at the docks must be overloaded by shocking the associated panels in Afterlife (one of the panels is in a room only accessible during Afterlife). Once done, music will play and the engine can be picked up in the Warden's Office.
The valves can be found in the infirmary, next to the Cerberus head. They are in a glass case protected by a lock. The lock can simply be opened with the key and the valves can be picked up.
The tank can be found at the docks, next to the M1927. In solo, the player must simply open the gate with the key and shock the nearby voltmeter in Afterlife to open the gate to the tank. However, with two or more people it is more complex: after unlocking the first gate, shocking the voltmeter will close it but open the one to the oxygen tank, and shocking it subsequently will open the first gate but close the second. Thus, two players must collaborate for one to shock the panel and the other to retrieve the part.
With at least one part, the player should go to the roof. It is accessible by entering Afterlife in the infirmary and going through a portal in the walkway with many doors, jump up (at the peak of the jump, the 'jump' button must be pressed again to vault over to the roof) and shocking a voltmeter next to the roof door. Icarus can be built there. Once all five parts are built, it can be boarded. Once any player boards it, the take-off sequence will initiate (with a loud alarm), and the plane will take off in approximately five seconds. After flying into a storm, it will crash into one of the support beams of the Golden Gate Bridge, and all players will fall down to the bridge. Icarus can be spotted on the bridge, on fire and falling into the ocean shortly after the crash.
After the player returns to Alcatraz and completes the current round, Icarus can be reused by finding five fuel tanks (located at the same locations as the parts previously, this time without having to do any puzzles). The fuel tanks can be used to refuel Icarus, which can then be flown again
How to get the Blundergat for free
Before proceeding with this, the players need the Hell's Retriever, obtained by feeding each of the three Cerberus heads and picking it up from the Citadel Tunnels. The players have to collect five blue skulls located around the map with the Hell's Retriever to obtain a free Blundergat (obtaining it from the Mystery Box does not complete this step). These skulls are always located in the same spots, and though they cannot be seen until Golden Gate Bridge has been visited, they can be obtained at any point if the player knows where they are. To collect them, simply throw the Hell's Retriever at the skull, and if correctly done it will return to the player with the skull on it.
The skulls are found in the following locations:
- Next to Juggernog, on a lamppost up the hill, obtainable either by jumping up at the corner closest
to it or from the gondola as it is moving - At the docks, on the third leftmost pillar of the adjacent dock
- On the roof, sitting on an edge when going to the left corner furthest from the roof entrance
- Next to the starting room (on the way to the first Cerberus head), in a lit up jail cell with a regular skull on the table
- Outside the Warden's Office, on a utility pole when looking out the window next to Speed Cola. It is recommended to not board up this window beforehand as it can hinder the view.
Once all skulls have been collected, the Demonic Announcer is heard laughing, and a Blundergat can now be picked up from the table by Speed Cola in the Warden's Office. Brutus will talk to the player when it is picked up.
Pop Goes the Weasel (MOTD Main Easter Egg)
Pop Goes The Weasel is the main Easter egg featured in Mob of the Dead and it is the continuation of the achievement/trophy, No One Escapes Alive. It cannot be completed on Easy difficulty, and has to be done with at least two players of whom one is Albert "Weasel" Arlington. However, all steps can be done in solo except for the ending, which is required to get the achievement and end the game. It is also possible to do the Easter egg on custom games while doing split screen.
Note that steps 1 and 2 are interchangeable and can be done without any particular order.
This Easter egg has two possible outcomes: the cycle continues or is broken. Despite its description, each outcome will unlock the achievement/trophy.
Step 1: Obtaining the free Blundergat
See "How to get the Blundergat for free"
Step 2: Obtaining the spoon
See "Golden Spork"
Step 3: Listening to the logs
Before proceeding with this step, the cycle must have been completed at least three times.
Between the Citadel Tunnels and the docks, in the spiral staircase, the number pad should now be rapidly changing numbers (which can also be heard as constant clicking when entering the staircase). A player should now enter Afterlife and use the number pad to input the mobsters' prison numbers: 101, 386, 872 and 481. After each number is entered, the number pad will blink and shuffle the digits. It is advised that the player in Afterlife has another player near their original body to repeatedly partially revive them thus granting more time available for the player in Afterlife to enter the numbers (due to the Afterlife meter halting when the player is being revived), as the time in Afterlife would normally be barely enough for an unassisted player to put the correct numbers and revive themselves. When done, Brutus will talk to the player, the screen will turn black and white and Stanley Ferguson starts narrating the events of the mobsters' escape plan.
After the narration ends, pairs of headphones resembling a power-up appear subsequently, continuing the narration. New drops will not appear until the previous one has been listened through completely. The first appears on the staircase back up to the Citadel Tunnels, then near Double Tap Root Beer, then on the walkway between the Warden's Office and cafeteria, then in the staircase from cafeteria to infirmary, and finally on the staircase to the roof. After listening through each recording, the Demonic Announcer's laugh is heard.
Step 4: Ending
Now, a player must board the plane in Afterlife. The plane needs to be refueled, the game will not give a prompt to enter the plane, but using the action button next to it should be enough. If done right, the player will be put onto the plane, and the other players will also go immediately into Afterlife and appear on the plane. The plane will take off and crash into the bridge as always. The players will land in Afterlife mode, with their original bodies in the electric chairs. Each player must revive themselves, and when done, Weasel will now appear as an enemy target for the other mobsters, and can be damaged by them and vice versa. The zombies will also not attack him at all and the achievement/trophy will also appear at this point. In order to break the cycle, Weasel must kill all the other mobsters. To help with this and compensate for being alone against up to three, he has higher damage resistance. When all the other mobsters have been killed, either by Weasel or the zombies, the game ends, with the ending camera panning out vertically from the Golden Gate Bridge with an orchestral version of the regular ending song. In order to continue the cycle, the other mobsters must kill Weasel. When he is dead, the game ends with the regular camera angle but with a unique song.
Easter Eggs
- The song "Rusty Cage" by Johnny Cash can be played by activating three bottles scattered around the map. One is located on a bookshelf in the library (spawn area), another is located in the infirmary, near one of the baths filled with blood, and the last is located on the docks, tucked away between a crate and a fence. As with most of the other music Easter eggs, a strange sound can be heard when
the player is near one of the bottles. - When on the roof where the plane is assembled, the player can activate a "jump scare" Easter egg. The player is required to have a sniper rifle, such as the Barrett M82A1 or the DSR 50, and they must proceed to the far end of the roof, to the left of the runway. If the player scopes in on the firework display in the distance, a distorted picture of a face will flash up on the screen for a split second, accompanied by a high-pitched scream.
- Several audio logs can be accessed by typing the four character's prison numbers into the counter that operates the underground elevator. These audio logs, narrated by an older Stanley Ferguson, reveal information about what had actually occurred at Alcatraz and information about the group's current situation.
- To activate this Easter Egg, the player must find the number counter and enter in the number '115', upon entering Brutus can be heard shouting "Not this time!" or "Maybe next time" in a hushed whisper. The number will then change to '666'. Eventually it will then shift back to normal as if nothing had happened. No other effects occur during and after the easter egg has been activated.
- Ciphers and paper scraps can be found scattered around the map. The ciphers give some backstory to the characters while the paper, when formed, shows a comic drawing made by Weasel, with editor's notes scribbled on it.
- At the beginning of match, if the player stands still, and doesn't revive their character, dying from the time limit in Afterlife, the song "Samantha's Lullaby" can be heard.
- Inputting the numbers 935 in the number pad will activate Where Are We Going.
Inputting the number 115 in the number pad will make Brutus say either "NOT THIS TIME!" or "MAYBE NEXT TIME!" After which changing the numbers on the dial automatically to 666.
About Buried

Key Features of Buried
- Remington New Army (Box Weapon)
- Paralizer (Box Weapon)
- Time Bomb (Equipment from Box)
- Perks (Quick Revive, Speed Cola, Double Tap Root Beer, Juggernog, Stamin-Up, Mule Kick, Vulture Aid, PhD Flopper, Tombstone Soda)
- Turbine (Buildable)
- Trample Steam (Buildable)
- Subsurface Resonator (Buildable)
- Head Chopper (Buildable)
- Arthur (Frendly NPC)
- Ghosts (Mini Bosses)
Time Bomb

Paralizer

Turbine (Buried)
Part Locations
- The Mannequin
- It is in the back right corner, in the back room, on the main floor of the general store.
- The Fan
- It is located in the back room, on the second floor, to the immediate right, on a desk.
- The Tail
- It is located on the set of shelves on the far left, on the main floor of the general store, when entering through the front door.
Trample Steam (Buried)
Chicken wire
it is found leaning against the banister upstairs in the General Store.
Motor
it is found on the shelves in the middle of the main room in the general store, on the shelf below the half-fallen shelf.
Bellows
it is on the table in the back room on the second floor.
Flag
it is found in a barrel below the staircase.
Subsurface Resonator
Parts Locations
Note: All parts are found in the general store near the first Mystery Box spawn.
Table
Found leaning against the wall, to the right of the doorway to the back room, on the main floor.
Mount
Found leaning up against the wall opposite of the table, down the hallway, towards the back door of the general store.
Speaker
Found on a counter before the Weapon Locker.
Motor
Found in a corner at the top of the staircase.
Head Chopper

It is built with a stand, motor, hinge, and saw, which are all found in the general store.
Mount
Found in the back room on the ground floor.
Crank
Found on the counter in the middle back of the store.
Hinge
Found on the shelf in the center of the store.
Saw
Found in a barrel in the back of the store.
Be careful, as it is easy to confuse Head Chopper parts with parts for other Buildables. When built, it can be taken by any player as long as they do not have another buildable.
Usage
When selected, the player will hold the Chopper in the air in front of them. The player will lightly throw it when it is used. Upon landing, it will anchor to the ground and activate. Note that it is possible to throw the Chopper on a wall, causing it to stick to the wall. When activated, it will sit idle until a player or zombie walks over or beside it. When a zombie walks over or beside it, it will swing in an upward arc and chop the zombie in half or decapitate their head when the Chopper is on the wall. In most cases, the zombie will still be in close proximity to the Chopper, causing it to activate and promptly kill the zombie. When a player walks over it, the Chopper will also swing and inflict a considerable amount of damage. If it is mounted on the wall, ducking under the blade will cause the player not to recieve any damage. Like all buildables, a Head Chopper will continue to function until it is destroyed or breaks from use.
Vulture Aid

Arthur "The Giant"

Hitting Arthur with melee weapons will cause him to sprint for a short period of time (if Arthur hits a zombie while sprinting, the zombie will 'die' and will be forced to respawn). This can be used to make him follow a player with either of his items more closely. Shooting at him however, can wound him, which causes him to retreat to his cell and lock himself in, so that he must be freed with the key. However, if the player approaches The Giant before he locks himself in whilst they hold Booze or Candy, they can make Arthur come out of the cell before he locks himself in.
Items Associated with Arthur
There are a number of items that relate to Arthur and how he reacts to players. These items occupy the same slot as the chalk outlines for wall weapons, so the player cannot hold both at one time.
- The Key - The Key to his cell will open it to initially free him, and any subsequent times he locks himself back in when he is wounded. Whenever this happens, the key can be found on a hanger in
the following areas: - To the left of his cell. It will always be here when first releasing him.
- Hanging off the judge's bench in the Courthouse.
- In the middle room on the second level of the Saloon.
- In the Bank, behind the Deposit Box.
- Booze - Booze can be given to Arthur, which causes him to drink it and run off in the opposite direction of where he was given it. This can be used to clear the various debris blocking certain passageways around the map. The player that gave Arthur the booze will receive a bonus of points depending on the distance he traveled to the debris, ranging from a fairly small sum if he ran a short distance, or a much higher one if he ran a longer distance. Arthur is capable of downing both zombies and players in this state. He is also capable of obtaining Power-Ups for the player whilst he is charging.
- Booze can be found in two places: inside Arthurs Cell on a desk, or in the saloon on the counter/a table. The player may only obtain one bottle of Booze per round; subsequent bottles can be obtained via buying it from the register in the saloon for 1000 points.
- Candy - Candy can be found in the Candy Store, and can also be bought from the counter for 1000 points if one has already been used for the round. Candy has a number of uses when given to Arthur, depending on where he is when it is given:
If given on its own, Arthur will aggressively follow the player who gave it to him around, attacking any zombies and will be unresponsive to any other items until it wears off.
If given next to a crawler, Arthur will pick it up in his hands and follow the player around with it. Shooting him or knifing him will cause him to kill the crawler by throwing it on the ground and stomping on its head. - If given near a workbench, Arthur will examine the bench and go off to gather parts and construct a buildable on it, provided he is not shot at whilst gathering the parts. If a buildable is already in construction, he will simply fetch the remaining parts; otherwise he will collect all the parts for a random one. Arthur is able to construct a buildable in one go, but if a player is already in possession of a part, they must manually place it on the buildable.
If given near the current spawn of the Mystery Box, Arthur will punch the box, preventing it from rolling a Teddy Bear, this will prevent the Fire Sale Power-Up from being dropped by zombies unless the Mystery Box moved before it was punched by Arthur. It will also prevent it from being moved by Arthur again using candy by an empty box spawn. - If given near the Mystery Box that has just been rolled but the player has not accepted the weapon offered, Arthur will force the box to roll again.
- If given near an empty box spawn, Arthur will go and fetch the Mystery Box from its current spawn, and place it on the requested one, unless the Mystery Box has previously been locked in one spot.
- If given near a Subsurface Resonator without a Turbine, Arthur will find the workbench where the Turbine is built and carry it to the Resonator.
- f given near a Power-Up, Arthur will change it into a different one.
- If given near the chalk in the gunsmith shop, Arthur will take three of them and draw them at random locations. The player does not get any points for this.
- If given near the Deposit Box he can obtain the player a power-up for 2000 points.
Ghost
The Ghost is a special enemy that appears in the mansion in Buried. They fly close to the ground and float towards the player in a speed slightly faster than an average Zombie, and slow down once the player aims at them. For every hit the Ghost gets on a player, 2000 points are subtracted from their points count. If the player is out of points, they will do damage akin to regular zombies. They seem to spawn infinitely until the player leaves the house in which they dwell; the large house and the maze behind it that contains the Pack-a-Punch Machine. It is advised that all players store their points in the Bank before entering the house, unless they wish to Pack-a-Punch. Every four to five rounds, players can obtain a Random Perk Bottle power-up by entering the house when the lights are on. This will cause all zombies to disappear when a player enters and Ghosts will eventually drop the Perk Bottle once all players are outside and the last Ghost is killed. In co-op, when entering the mansion when the lights are on, multiple Ghosts spawn even outside of the mansion, targeting all players. The Ghosts spawn one at a time for each player, meaning there will be roughly four times as many when there are four players. If the player gets a bullseye on the dartboard in the saloon behind the small white line with a Ballistic Knife, the saloon piano starts playing on its own. If the player gets to the mansion piano within approximately 90 seconds, the player will see a Ghost playing the piano. They can get a free perk, even after purchasing four, by tipping her 10 points.If the player kills a Ghost, they will receive a free grenade
Mined Games (Buried Main Easter Egg)

At the beginning of the game, the players can hear Maxis talking about how to power up a tower seen from the starting room using an explosive found underground. Richtofen also talks to Samuel J. Stuhlinger about powering the tower as well, using an energy conduit that he says must be built, and warns Samuel not to let the tower be used to help Maxis.
This Easter Egg can be completed multiple times, however there are limitations. Once one side has been completed, it will be locked in all subsequent playthroughs until the other side has been completed as well, which will in turn lock that side until the originally completed side has been redone, just like with Tower of Babble on TranZit, and High Maintenance on Die Rise. Alternatively, the Endgame present on Buried also will reset all Easter Egg progress across all three maps, allowing players to redo them freely. In addition, joining a game in progress will allow the player to redo the Easter Egg so long as no one present in the game when it started has the desired side locked for the previously stated reasons. The canon ending is confirmed to be Maxis' side of the quest in the official Zombies Timeline.
Richtofen's Path
Step 1: Building the Guillotine
- The player must build the guillotine that is parallel from the side of the saloon. Be careful because some parts can be used for both the gallows and the guillotine, because of this, this step is also the point where the players commit to which side they are completing for the current game.
- Satellite Dish (Upstairs of Saloon, nearest side by the Guillotine buildable. Should be near the fence.)
- Spool of Wire (Gunsmith room downstairs near the catacombs entrance in the corner.)
- Crystal (Go up the railing from the Saloon into the catacombs, turn left, take the next left, jump over the hole and it will be in the debris directly ahead.)
- Antennae (The barn downstairs, head towards the catacombs should be in one of the stables on the right.)
Step 2: Powering the Red Orbs
The player now needs to power up four red orbs using the Paralyzer. They are located as follows:
- In the alleyway between the saloon and the candy shop.
- To the left side of the entrance to the church, behind a rock.
- In the tunnel system above the town.
- To the right side in the foliage before the entrance to the mansion from the maze.
Step 3: The Lantern
Using a grenade, the player needs to time it so that it knocks a purple lantern out of the air, which will float from the courtroom to the church, or from the courtroom to the jail cell. After this, the player must pick it up. To power up the lantern, the player must "kill" at least 10 mistresses in the haunted mansion. After the player has powered the lantern with enough "souls", the player has to place the lantern on a symbol on the roof of the gunsmith shop.
Step 4: Deciphering the code
Decipher code
Deciphering the code that appears above the symbol on the wall using the "tic-tac-toe" cipher will reveal the name of three signs located in the tunnels, which the players need to hit with the Galvaknuckles or the Bowie Knife to make the "wisp" appear. The order doesn't matter. These signs are randomly selected out of the five signs available.
The Five Tunnel Signs
The player will find the following signs in the tunnels. Each is 17 characters long if the player counts the spaces as a character. The players need only decode the first letter of each sign as all five are different.
The Signs:
DRY GULCHER SHAFT
LUNGER UNDERMINES
CONSUMPTION CROSS
GROUND BITER PITS
BONE ORCHARD VEIN
Step 5: Powering the Guillotine via Wisp
Note: The player must have Vulture Aid in order to see the wisp.To move the wisp, a player has to pass through it in a 15 seconds limit, or else they will fade away and the player will need to hit the signs again. Only players with the Vulture Aid Perk can see it. Once the player taps the button, they will disappear and reappear somewhere else, with the player able to see it through the wall via Vulture Aid. It appears in front of the final sign, then on the second level of the barn, then to the second floor of the jail cell building, just past the wall weapon location, then to the second floor of the general store, then to the candy store and then it goes to the guillotine, where it will stay in front of the guillotine. The player must lure zombies nearby the guillotine. Doing so will cause the orb to flow into the zombie, which the player must kill for its energy. After killing each zombie, an orb will revolve around the crystal component of the guillotine. After powering up the guillotine, Richtofen tells the player that they need a time bomb.
Step 6: The Switch in the Future
Up until this point, one person can do the previous steps solo and then have three others join in. However, there MUST be four players to do this step. Once the player has placed a Time Bomb ON the guillotine bench, have all four players surrounding the guillotine. The player now has to activate the time bomb. Doing so will send the player into the future to Round ∞, where the game is now in black and white and the zombies are near-invulnerable. During the 90 seconds that the player spends in "Infinity Mode" before it sends the player back, the player will have to find the switch. Search the four (sometimes only two or three spawn) dead bodies of Misty, Marlton, Samuel, and Russman. The switch will be randomly placed on one of the bodies, with bodies being spawned randomly at these places:
- Directly in front of the guillotine.
- In front of the saloon entrance stairs.
- To the left of the gunsmith entrance.
- In the crevice behind the barn and the gunsmith house, where the Navcard Table parts are located.
- In front of the jail house entrance.
- In between the general store and the box location.
- To the right of the candy store entrance coming from the courthouse, near when the player drops down from the general store balcony.
- In between the giant rock near the gallows and the awning of the candy store, near the arrow sign.
- Behind the rock to the left of the church, where the red orb is.
- Just past the entrance to the church, nearby the workbench.
- The alleyway between the bank and barn walls, the body will be laying on the wall of the bank.


Mined Games (Buried Main Easter Egg) (Continued)
After gaining the switch the player must now place it on the guillotine.
Note: Should the players fail to find the switch, they will need a new Time Bomb. One way to do this is to have the player with the Time Bomb hit the box until they obtain the Monkey Bomb and then have all players hit the box until someone obtains the Time Bomb again. Alternatively, the players will need a Max Ammo. For this, The Giant can be useful as players can use him to effectively buy random power-ups for 2100 points by paying 1000 points to buy the Candy if the current one has already been used for the round, and then 1100 points to create a 1000 point Bonus Points power-up at the Bank. Simply feed the giant the candy near the power-up and he will change it. While both these methods can be expensive if the players are unlucky, the alternative is to run rounds until a zombie drops a Max Ammo, which can get them killed. While in Round Infinity, the giant can be fed candy which will kill zombies. Monkey Bombs also work as well. All ammo and equipment used during Round Infinity will be fully refunded upon returning.
Step 7: Switches in the Maze
The players now need to enter the maze, where there will be switches with four different colors (Red, Green, Blue, Yellow) on four different gates. All players will have to activate these switches in the correct order, via trial and error. If a switch has been activated in the correct order, it will spark after all four have been pulled. Note: that no switches will spark until all of the switches have been activated. They will only spark if they were activated in the correct position. If the switches are activated in the incorrect order (if they aren't all sparking) they can be reset by activating all of them and then having all four players return to the main area before having all players run through the Mistress's house together.
Note: Sometimes a gate switch will not spawn (Yellow, is the most reported switch to not spawn). Currently the only way to fix this is to reset the switches in the method detailed above.The yellow switch can actually sometimes be found on a hedge in the center of the maze.
Note: In occasion yellow is not spawning on the gates, it can be found somewhere hidden in the bushes in the area where the fountain/teleport is.
Note: If the players go into the candy shop, behind the counter, there will be 4 jars. They each have a color in them which represents the color of the switches. Reading them from left to right, while a good starting point, may or may not give the player the correct color order. Trial and error will be the best bet for everyone on the team. Remember to mark which possibilities have already been tried by the team.
Step 8: Make a Wish
The players will need to have The Giant break the fountain in front of the church/mansion, which will cause water to start spewing out. Next the player will need to interact with the fountain in order to "make a wish". After doing so, metal targets will spawn via lightning in several locations with each player needing to shoot them ALL before they disappear. These locations where the targets spawn are:
- Beside the candy store and in front of the court room. (20 targets)
- The left side of the mansion, in the windows. (23 targets)
- Inside the saloon. (19 targets)
- By the jail cell. (22 targets)
Richtofen's side of Mined Games is complete and the player(s) will receive all perks for the remaining of the game, but there is one more step to fully complete the story [See Endgame]
Note: the Paralyzer DOES work on the targets, and is a useful tool in hitting them all.
Note: It is also recommended that the giant be given Candy near a crawler so that the players need not worry about the round ending in the middle of trying for the challenge.
Maxis' Path
Step 1: Build the Gallows
The players must build the gallows that is next to the entrance of the courthouse. Be careful because some parts can be used for both the gallows and the guillotine. Just as with Richtofen's path, this is where the player chooses which side they are following for the current playthrough.
- Battery (Behind the altar in the church.)
- Spool of Wire (Mule Kick room downstairs near the catacombs entrance in the corner.)
- Antennae (Barn downstairs towards the catacombs in one of the stables on the right.)
- Bulbs (In the room above The Giant's cell on boxes near where the box can spawn.)
- Step 2: Orb Breaker
The players now need to destroy the four red orbs using the Subsurface Resonator (which requires the Turbine). They are located as follows:
- In the alleyway between the saloon and the candy shop.
- To the left side of the entrance to the church, behind a rock.
- In the tunnel system above the town building.
- To the left side in the foliage before the entrance to the mansion from the maze.
Step 3: The Lantern
Using a grenade, the players need to time it so that it knocks a purple lantern out of the air, which will float from the courtroom to the church, or from the courtroom to the jail cell. It will disappear ocassionally if the players fail to hit it, and it will also disappear if the players leave the lantern on the ground too long. After this, a player must pick it up.
Step 4[/]b: Sugar Rush
To power up the lantern, the players must kill zombies using The Giant (after he has been given candy), the Trample Steam, Subsurface Resonator, Head Chopper, or Nuke Power-Up. The player with the lantern must stand close to the zombies being killed. After the players have powered the lantern with enough "souls", the players have to place the lantern on a symbol on the roof of the gunsmith shop.
Step 5: Decryption
Deciphering the code that appears above the symbol on the wall using the "tic-tac-toe" cipher will reveal the name of three signs, which the players need to hit in order with the Galvaknuckles or the Bowie Knife to make the "wisp" appear. These signs are randomly selected out of the five signs available.
The Five Tunnel Signs
The players will find the following signs in the tunnels. Each is 17 characters long if the player counts the spaces as a character, however, the player needs only to decode the first letter of each sign as they are all different.The Signs:
DRY GULCHER SHAFTLUNGER UNDERMINES
CONSUMPTION CROSS
GROUND BITER PITS
BONE ORCHARD VEIN
Step 6: Energy and Western Time Travel
Note: The players will have to place a Time Bomb before they activate the wisp. The step requires the players to open the 1250 points couch separating the tunnels and the upper level of the gunsmith building, and they will need to have The Giant destroy the barrier between the General Store and the candy Shop. The player that hits the signs will need to follow the wisp while there are zombies near it throughout its path, thereby sustaining the wisp, otherwise the wisp will fade out.
Mined Games (Buried Main Easter Egg) (Continued) (Again)
- After doing so, the player must follow the wisp on its path to the gallows. It will travel through the tunnels into the courtroom. It then goes past the Speed Cola Perk-a-Cola machine towards the jail cell. Going on the porch, it will make a loop and go to the upper level of the jail cell, towards the barn. Upon entering the barn, it will drop down the ledge and float through the tunnels. It then will exit through the gunsmith building's upper level, then will float towards the Saloon and take a left towards the candy shop. Passing through where the barrier was, it will continue towards the courthouse until it reaches the gallows, in which it will power up one container. While the player is following the wisp, the player must have zombies near the wisp throughout its path, thereby sustaining the wisp, otherwise the wisp will fade out. It is easier to do this step by having zombie "checkpoints", recommended spots are in front of the jail cell, in front of the gunsmith building, and in front of the saloon. The players can also start a round as the wisp is going towards the gallows, as the zombies will constantly spawn in front of the player and sustain the wisp. If doing this, it is recommended to either have a Pack-a Punched weapon, be done on a lower round, or both for easier control of the zombies. At this point, the player will have to use the Time Bomb to travel back in time, and repeat the above process. Step 7: For Whom the Bells TollThe players are now able to ring the bells placed around the map by using the action button. There are three locations where the bells are, with each location having three bells each. These places are:
- The bottom floor of the courtroom.
- Left side of the judge's podium.
- Table on the right side of the courthouse closest to the podium.
- Corner of the courthouse, take a left as soon as the players enter.
- The second floor of the candy shop, not the room with the Power Switch.
- On the corner of the square table along the wall.
- On the table with two pots, near the couch blockade.
- On the chair to the right side of the door to the stairway.
- The top level of the barn.
- On the bale of hay just before the players drop down to the jail cell.
- To the right of the hole in the wall near the gunsmith building, on a bale of hay.
- On a bale of hay to the right of the gap in the railing.
In the room just past the secret bookcase in the haunted mansion, there is a switchboard on a sofa with a lever. The switchboard has a 3x3 pattern of lights, which when activated, will light up yellow or green. The columns from left to right correspond to the bells in the candy store, the barn, and the courtroom bells respectively. After figuring out which bell corresponds with which light, the team will have to activate the switchboard, and the first light will appear. One player has to callout which light has lit up, while the other three players must be in each location ready to ring the bell that is called out. If the player successfully rings a bell, the light will turn green and another light will turn yellow, signifying which location/bell to ring.
Note: For the person in the mansion, it is recommended to have the Galvaknuckles so the witch will die in one hit, as the player will most likely be in there awhile. The players also have to ring the bell within a certain timeframe, or else the switchboard will reset.
Step 8: Make-A-Wish
The players need to have The Giant break the fountain in front of the church/mansion, which will cause water to start spewing out. Next, the players need to interact with the fountain in order to "make a wish". After doing so, metal targets will spawn via lightning in several locations with each player needing to shoot them all before it disappears. These locations where the targets spawn are: - Beside the candy store and in front of the court room.
- The left side of the ghost mansion, in the windows.
- On the railing inside the saloon.
- By the jail cell.
Maxis's side of Mined Games is complete and the player will receive all Perks for the rest of the game, but there is one more step to complete the story. [See Endgame]
Note: As with Richtofen's side, it is recommended to have the Giant care for a crawler so that it will not die and prematurely end the round.Endgame
Requirements to end the game:
- All four players must have completed Tower of Babble, High Maintenance, and Mined Games, and all must be done for the same side
- All NAV Tables must be built with the correct NAV Cards inserted
Note:
- All Easter egg progress will be erased
- This can be done anytime, including the game where the players finish the Mined Games EEAt the back of the courthouse on the first floor is a box showing a 3x4 light grid. This box is 'The Easter egg Tracker'. This shows the Easter eggs that each player has completed as well as the side that they completed it for. The far left light represents the Tower of Babble Easter egg. The middle light represents the High Maintenance Easter egg. The far right light represents the Mined Games Easter egg. Orange light indicate Maxis whereas blue lights Indicate Richtofen. For example. If all lights show blue, then all players have completed each Easter egg for Richtofen. If all show orange then all players have completed the Easter eggs for Maxis. If two rows show a color then only two players have completed all Easter eggs for a character.
Richtofen's Ending
If all four players have completed all three Easter Eggs on Richtofen's side, have a player shoot the 'Easter Egg Tracker' and press the revealed button. The screen will shake and the players will hear a short confrontation between Richtofen and Maxis. After Richtofen declares his victory and Maxis ceases to exist, he will partially take over Samuel's body and remain inside Samuel's head. As a bonus, all players will have a permanent Fire Sale as well as a special variant of Mule Kick that allows the player to carry four weapons instead of three.Maxis' Ending (Canon)
If all four players have completed all three on Maxis' side, have a player shoot the 'Easter Egg Tracker' and press the revealed button. The screen will shake and the entire map will fade orange, then there will be a short confrontation between Maxis and Richtofen. After Maxis overthrows Richtofen and takes control of the Aether, he will send Richtofen's soul into a random zombie and all the zombies' eyes will change to orange. The 'Richtofen Zombie' can be identified by its blue eyes. There is no physical reward but each time a 'Richtofen Zombie' is killed, it will drop a power-up.Trivia
The after effects are: - Maxis' side: The pylon above the surfaces will spew orange flares. Orange dust will also form. On the world map, the "Buried" icon will flash with orange lightning.
- Richtofen's side: The pylon above the surface will spew blue flares. Blue dust will also form. On the world map, the "Buried" icon will flash with blue lightning.
- The name "Mined Games" is a play on the word "mined" and the term "mind games".
- For Richtofen's side, it is possible to do steps 1-5 solo and have three others join later on.
- The seventh step of Maxis' side, "For Whom the Bells Toll", is a reference to Ernest
- Hemingway's famous novel For Whom the Bell Tolls.
- If a player remains close to a 'Richtofen Zombie' but doesn't kill it, the player can hear quotes from Richtofen, usually commenting on the state of the zombies.
- Activating the musical Easter egg "Always Running" during the Sharpshooter step, will cause the Sharpshooter music to play for the rest of the game.
About Origins

Six generators are found across the map, which acts as replacements for the classic Power Switch, and only power the area around it. If they are all powered at once, they activate the reskinned Pack-a-Punch Machine. For the first time, the Mystery Box requires power to be used. The Generators also power perk machines, although there are only five conventional perk machines and there are no machines at Generators 2 and 6. There are no new perks, but rather a machine called Der Wunderfizz, that gives the player a random perk bottle when activated, much like the Mystery box.
The three Giant Robots: Freya, Odin, and Thor (from left to right, facing Generator Five from the excavation site) travel across the map in their respective "lanes" and will instantly down players when they step on them unless the player shoots the glowing foot or the player has a golden helmet. There are three new power-ups:
Zombie Blood, which masks the player with Zombie blood, in which they see reddish-orange, get an increased FOV and aren't attacked by Zombies or Panzer Soldats for a short time.
Blood Money, which is obtained using the Shovel on graves. Blood Money is similar to Bonus Points, as it gives the player a random amount of points between 50-250 when collected.
The Empty Perk Bottle, which can be found by digging up special dig spots around the map. Upon collecting the power-up, the player that picked it up will gain an extra perk slot, and will then be able to purchase an additional perk.
Buildables also return, featuring four Elemental Staffs (the Staff of Lightning, the Staff of Fire, the Staff of Ice, and the Staff of Wind), the Zombie Shield with a new dieselpunk aesthetic and the Maxis Drone, which is similar to the MQ-27 Dragonfire, only using Dr. Maxis' brain. The Maxis Drone, after deployed, will follow the player, shooting at Zombies and reviving downed players, it also must recharge and be picked up again after each use.
Players can also use shovels at certain spots to dig up certain items. These may hold beneficial items, like a weapon, Power-Up, or staff part. They may also spawn something hazardous, like a Zombie or a live grenade.
The Demonic Announcer for this map is Samantha Maxis, who has a different announcing voice than she did in previous maps.
Key Features Of Origins
- Staffs (Wind, Fire, Ice, and Electric)
- Tank
- Der Wunderfizz(Random Perk Machine)
- Panzer Soldat (Boss)
- The Crazy Place
- Giant Robots
- Zombie Blood(Power Up)
- Blood Money(Power Up)
- Empty Perk Bottle(Power Up)
- Maxis Drone(Buildable)
- G-Strike [Tatical Grenade]
- One Inch Punch[Melee]
- Ballista(Wall Weapon)
- KSG(Box Weapon)
- MG08/18 (Box Weapon)
- STG-44(Wall Weapon)
- MP-40(Wall Weapon)
Fire Staff
The Staff of Fire shoots three balls of molten rock, horizontally, when fired, which will cause zombies near the impact zone to burn, stunning them in pain before either burning up or recovering depending on if shot again. Once upgraded to the Kagutsuchi's Blood, it functions the same as its previous version, except with a bigger blast radius and any zombies hit point blank range will be vaporized. The player can also hold down the firing button in order to charge it up, at the cost of more ammo per charged shot. When charged and released, it fires three fireballs, horizontally like the previous version. However, any zombie nearby will be incinerated and it will last on the floor/wall for a few seconds, before it explodes in a bigger fireball.
Furthermore, the Kagutsuchi's Blood has a melee attack that involves swiping with the spikes on the head of the staff. This attack is a one hit kill until round 16. If the One Inch Punch is equipped, its melee attack overrides the staff melee attack. If a player has PhD Flopper and dives to prone with the fire staff equipped, the zombies will die by the explosion, but the flop will also create a fire effect that will do extra damage to zombies and leave them burned as well. The only way the player can acquire PhD Flopper is from Der Wunderfizz.
After upgrading, it gains a secondary "attachment" called Sekhmet's Vigor which when activated by pressing left on the D-Pad, will cause the player to flip the staff and use the bottom end. This can be used to revive a downed player by "shooting" them directly. The "vigor" is a fast-moving ball, which will travel in a straight line. It is recommended to make your shots count, because it is very easy to miss with this weapon.
How to obtain
To obtain the Staff of Fire, the player must gather three parts of the staff and the elemental crystal, as well as the gramophone and the correct records to access the Crazy Place and the lower levels of the Excavation Site.
- The staff parts can be obtained in the following locations:
- After powering Generator 6, the reward box next to it will open with one of the parts
- After destroying the plane in the sky glowing orange, which will spawn on the round after opening the path to church. The staff part will be dropped next to the soul box closest to
Excavation Site, on the small walkway between two of the giant footprints. - Dropped by the Panzer Soldat on round 8 when it is killed
The red record can be found near the church. It can spawn on some boxes between the tank and the staircase up (may be hard to spot if the tank is in place), on the benches of the church opposite of the basin, or on some boxes next to Generator 6. The gramophone always spawns on the floor inside the Excavation Site, and the record to access the lower levels can be found outside around the Excavation Site. The elemental gem can be found inside the Crazy Place, and to access it the player needs the red record as well as the gramophone. The entrance to the Fire tunnel is near spawn (Generator 1), on the way to Generator 3. Once in the Crazy Place, there will be a pedestal that will open up with a red glow, with the elemental gem arising from within. Note that the gem may only be picked up if the Crazy Place was accessed from the tunnel matching the element of the gem. Once all parts have been collected, the staff may be built in the lowest level of the Excavation Site, in the red pedestal. After it is built, it can be picked up by any player, and if the staff is switched to another weapon later on or the player holding it bleeds out (or disconnects), the staff will return to its pedestal.
How to upgrade to Kagutsuchi's Blood
After obtaining the Staff of Fire, it can be upgraded to Kagutsuchi's Blood. First, the player must solve the riddle located in the Crazy Place, located in the Fire part of it. The riddle in itself is fairly easy, as the player must kill approximately 30 zombies with the Fire staff on the metal grates. If done correctly, the zombies will shortly explode into a black smoke cloud after dying, and they will fill up the four cauldrons nearby. Note that this step can be done at the same time as upgrading the rest of the staffs, as the zombies killed will count for their final steps. Once the riddle in the Crazy Place has been solved, there will be another in the original realm. On the basement of the church, there are seven torches on the walls with a number below them (one of them is a bloodstain that represents the number 4, instead of being written in chalk like the rest). Upstairs on the far wall, there are symbols on the wall, with four of them lit up. Using the ternary numeral system, the player must decipher the symbols into numbers and light the torches with the appropriate numbers using the staff. The images below can also be used as an easy reference sheet. Note that 4 is always one of the numbers. Once all four torches have been lit, an audio cue will play and a beam of light shooting up can be seen coming from the Excavation Site.
Next, the player will have to order the floating rings inside the lower levels of the Excavation Site so that the lights on the four rings are red. The rings can be rotated by pulling the levers located around lower levels, two on the normal walkway and two on the wooden scaffoldings. Once all rings' lights are red, the red orb inside of them must be shot with the staff. It should glow red, and shoot up in the air. Finally, the player must place the staff inside the red pedestal in the Crazy Place, and kill approximately 20 zombies in the Crazy Place to collect their souls into the staffs. Once it is done, Samantha may talk to the player about the "power of fire being available", and the staff icon on the HUD now has a red outline. The Kagutsuchi's Blood can now be picked up from the pedestal. As with the regular Staff of Fire, if the staff is lost by any means, it will be returned to its pedestal in the Excavation Site, and it does not have to be upgraded again.

Ice Staff
The Staff of Ice shoots blasts of ice when fired, and similarly to the Winter's Howl, will slow down zombies, eventually freezing them and cracking them apart.
Once upgraded to the Ull's Arrow, it functions the same as its previous version, however its blast of ice has more range and a wider area of effect. The player can also hold down the firing button in order to charge it up, at the cost of more ammo per charged shot. When charged and released, it fires an initial blast of ice, then expands in a circle, creating a blizzard attracting nearby zombies towards it and instantly freezing and killing them.
If a player shoots three burning wagons located around the map with the ice staff, a Zombie Blood will appear at the top of the excavation site. This can be done once every round. The three wagons are located:
Just outside the excavation site, by the MP-40 wall-buy.
By the footprint with the stone chest outside of Generator 5 and Stamin-Up.
Just outside of the trenches behind the excavation site, (the Church), more towards Generator 4.
Note that if the player does not fire at the wagons in a time frame, the wagons will start on fire again, but if they get all three and miss the Zombie Blood power up, they will not start again. Also, if it is heavily raining, the wagons will not be on fire.
The blast of ice doesn't instantly kill zombies, so before freezing and shattering the zombie may have a chance to hit you, before it shatters. However, in Black Ops III, the zombies will die instantly.
Furthermore, the Ull's Arrow has a melee attack that involves swiping with the spikes on the head of the staff. This attack is a one hit kill until round 16. If the One Inch Punch is equipped, its melee attack overrides the staff melee attack.
After upgrading, it gains a secondary "attachment" called Sekhmet's Vigor which when activated by pressing left on the D-Pad, will cause the player to flip the staff and use the bottom end. This can be used to revive a downed player by "shooting" them directly. The "vigor" is a fastmoving ball, which will travel in a straight line. It is recommended to make your shots count, because it is very easy to miss with this weapon.
How to obtain
To obtain the Staff of Ice, the player must gather three parts of the staff and the elemental crystal, as well as the gramophone and the correct records to access the Crazy Place and the lower levels of the Excavation Site.
The staff parts can be found in the ground and can be dug up from digspots on a round when it is snowing. Typically it is snowing on rounds 2-4, round 10 and randomly from there on. One part can be found in the starting area (from spawn to workshop, on either side), one in the middle area of the map and one near church.
The blue record can be found near Generator 2, inside the tank station on one of the shelves. The gramophone always spawns on the floor inside the Excavation Site, and the record to access the lower levels can be found outside around the Excavation Site.
The elemental gem can be found inside the Crazy Place, and to access it the player needs the blue record as well as the gramophone. The entrance to the Ice tunnel is near the church. Once in the Crazy Place, there will be a pedestal that will open up with a blue glow, with the elemental gem arising from within. Note that the gem may only be picked up if the Crazy Place was accessed from the tunnel matching the element of the gem. Once all parts have been collected, the staff may be built in the lowest level of the Excavation Site, in the blue pedestal. After it is built, it can be picked up by any player, and if the staff is switched to another weapon later on or the player holding it bleeds out (or disconnects), the staff will return to its pedestal.
How to upgrade to Ull's Arrow
After obtaining the Staff of Ice, it can be upgraded to Ull's Arrow. First, the player must solve the riddle located in the Crazy Place, located in the Ice part of it. Above the portal, there are six panels of stone and ice floating, with symbols of base-4 representations of numbers. On the wall, there is a blue panel with dots in various patterns which are base-3 representations of numbers. The player must use the pattern shown on the ice panel, in order to determine which stone panel to shoot with the Staff of Ice, which when done correctly will cause the stone to flip around. To complete the riddle, all six stone panels must be flipped. There are twelve different patterns which can appear on the ice panel, but only six will appear, one for each stone tablet. The image below can be used as reference without needing to decipher the symbols.
Once the riddle in the Crazy Place has been solved, there will be another in the original realm. There are three gravestones with water flowing out of them, which have to be shot with the Staff of
Ice to freeze them, then a bullet weapon to destroy them. The three locations of the gravestones are:
- To the right of the MP-40 near Generator 4
- Between the Excavation Site and a giant footprint, close to Generator 4
- On top of the small hill when going right from the back exit of the bunker next to Generator 2, next to the downed mech's hand
Next, the player will have to order the floating rings inside the lower levels of the Excavation Site so that the lights on the four rings are blue. The rings can be rotated by pulling the levers located around lower levels, two on the normal walkway and two on the wooden scaffoldings. Once all rings' lights are blue, the blue orb inside of them must be shot with the staff. It should glow blue and shoot up in the air. Finally, the player must place the staff inside the blue pedestal in the Crazy Place, and kill approximately 20 zombies in the Crazy Place to collect their souls into the staffs. Once it is done, Samantha may talk to the player about the "power of ice being available", and the staff icon on the HUD now has a red outline. The Ull's Arrow can now be picked up from the pedestal. As with the regular Staff of Ice, if the staff is lost by any means, it will be returned to its pedestal in the Excavation Site, and it does not have to be upgraded again.

Electric Staff
The Staff of Lightning shoots bolts of lightning when fired, and similarly to the Wunderwaffe DG-2, will chain and kill multiple zombies, although it is limited in the fact that the lightning will chain up to two or three zombies per bolt. If shot at the feet of zombies, it is possible to kill more than two-three zombies. Once upgraded to the Kimat's Bite, it will chain more zombies than its previous version.The effectiveness for this weapon runs out at about round 25 as normal attacks will only make crawlers (unless the player gets a headshot, upgraded or not), however the charged attack can effectively kill until round 30-40. The player can also hold down the firing button in order to charge it up, at the cost six ammo per charged shot, giving the player three before they have to reload. When charged and released, it fires a slow moving ball of electricity, which will travel in a straight line until it reaches a wall or floor. While passing by zombies or on the wall or floor, it will release bolts of lightning, stunning and killing nearby zombies. However this will not kill a large amount of zombies, so it is recommended to keep moving as zombies can still hit the player.
Furthermore, the Kimat's Bite has a melee attack that involves swiping with the spikes on the head of the staff. This attack is a one hit kill until round 16. If the One Inch Punch is equipped, its melee attack overrides the staff melee attack.
After upgrading, it gains a secondary "attachment" called Sekhmet's Vigor which when activated by pressing the "use attachment" button, which will cause the player to flip the staff and use the bottom end. This can be used to revive a downed player by "shooting" them directly. The "vigor" is a fast-moving ball, which will travel in a straight line. It is recommended to make shots count, because it is very easy to miss with this weapon.
How to Obtain
To obtain the Staff of Lightning, the player must gather three parts of the staff and the elemental crystal, as well as the gramophone and the correct records to access the Crazy Place and the lower levels of the Excavation Site.
The staff parts can be found in areas only accessible by jumping off the tank at certain locations. These locations are:
- On the way from the church to the tank station, there will be a wooden cutoff staircase on the right before the trench to Generator 2 (note that Thor can step on the ground where the staff part is which can down unwary players)
- On the way from the tank station to the church, there will be a cutoff wooden scaffolding on the left linked to the Excavation Site, which leads the player to a small hole where they can pick up the staff part
- On the way from the tank station to the church, there will be a dirt path before church on the right that leads to an upper level of the church where the staff part can be picked up.
Unless there are two or more players to use the tank, it is very difficult though barely possible to obtain both of the parts on one run on the way back to church. The purple record can be found near Generator 4. It can spawn inside the tunnel near the gateway to the Crazy Place, on the bandwagon to the left when entering the tunnel, or on the table next to the Der Wunderfizz machine. The gramophone always spawns on the floor inside the Excavation Site, and the record to access the lower levels can be found outside around the Excavation Site.
The elemental gem can be found inside the Crazy Place, and to access it the player needs the purple record as well as the gramophone. The entrance to the Lightning tunnel is near Generator 5. Once in the Crazy Place, there will be a pedestal that will open up with a purple glow, with the elemental gem arising from within. Note that the gem may only be picked up if the Crazy Place was accessed from the tunnel matching the element of the gem.
Once all parts have been collected, the staff may be built in the lowest level of the Excavation Site, in the purple pedestal. After it is built, it can be picked up by any player, and if the staff is switched to another weapon later on or the player holding it bleeds out (or disconnects), the staff will return to its pedestal.How to upgrade to Kimat's Bite
After obtaining the Staff of Lightning, it can be upgraded to Kimat's Bite. First, the player must solve the riddle located in the Crazy Place, located in the Lightning part of it. Near the portal on the wall, there are purple triangular shapes on the wall, representing a keyboard. On the opposite walls are notes of chords that must be played on the keyboards using the staff. There are three chords, and each chord has three notes to play.
As the chords are never randomized, it is possible to simply memorize the notes to play each time. Only the bottom row is needed, the top row can be ignored completely. When numbering the seven keys on the bottom row from left to right (as in the image below), playing the following combinations will solve the puzzle: 136, 357, 246.The keyboard and notes needed for the puzzle
Once the riddle in the Crazy Place has been solved, there will be another in the original realm. There are eight panels that the player can interact with around the map (one of which is automatically completed, leaving seven in total), and the player must turn the knobs on the panels in the correct position. Note that this can be done at any point in the game as the player passes by the panels, as long as they remember how much each knob is turned, which can save a fair amount of time and unnecessary running. The panels are located in the following locations:
Right next to Generator 5 (has to be turned until it points down)
Basement of church, next to the torch with the number 3 (has to be turned until it points right)
Upstairs of church, next to the repairable window (has to be turned until it points up)
Next to Wind tunnel, to the right of its entrance (has to be turned until it points up)
Spawn room, at the bottom of the stairs (has to be turned until it points left)
Tank station (near generator 2) to the left of the back door (has to be turned until it points down)
Behind Excavation Site, next to the path towards church (has to be turned until it points up)
When doing this step after completing the riddle in the Crazy Place, the panels will spark with electricity until they are turned in the correct position. Only one panel will spark at one time, thus the next panel will not spark until the previous is completed. They go in the order listed above. Once all knobs are turned in the correct position, an audio cue will play and a beam of light shooting up can be seen coming from the Excavation Site. Next, the player will have to order the floating rings inside the lower levels of the Excavation Site so that the lights on the four rings are purple. The rings can be rotated by pulling the levers located around lower levels, two on the normal walkway and two on the wooden scaffoldings. Once all rings' lights are purple, the purple orb inside of them must be shot with the staff. It should glow purple, and shoot up in the air. Finally, the player must place the staff inside the purple pedestal in the Crazy Place, and kill 25 zombies in the Crazy Place to collect their souls into the staffs. Once it is done, Samantha may talk to the player about the "power of lightning being available", and the staff icon on the HUD now has a red outline. The Kimat's Bite can now be picked up from the pedestal. As with the regular Staff of Lightning, if the staff is lost by any means, it will be returned to its pedestal in the Excavation Site, and it does not have to be upgraded again.
Wind Staff
The Staff of Wind shoots blasts of wind when fired, (similar to the Thundergun), and will instantly kill zombies at point blank range until round 23 and knock back any zombies further away. However, the range is not as far as the Thundergun, so you will have to be a bit closer to kill zombies with it. Once upgraded to the Boreas' Fury, it functions the same as its previous version, however its blast of wind has more range and a wider area of effect. The player can also hold down the firing button in order to charge it up, at the cost of more ammo per charged shot. When charged and released, it fires an initial blast of wind, then expands rapidly to form a tornado, attracting any zombies fairly close to it and dragging them to the center, instantly killing them.
Furthermore, the Boreas' Fury has a melee attack that involves swiping with the spikes on the head of the staff. This attack is a one hit kill until round 16. If the One Inch Punch is equipped, its melee attack overrides the staff melee attack.
After upgrading, it gains a secondary "attachment" called Sekhmet's Vigor which when activated by pressing left on the D-Pad, will cause the player to flip the staff and use the bottom end. This can be used to revive a downed player by "shooting" them directly. The "vigor" is a fast-moving ball, which will travel in a straight line. It is recommended to make your shots count, because it is very easy to miss with this weapon.
How to obtain Edit
To obtain the Staff of Wind, the player must gather three parts of the staff and the elemental crystal, as well as the gramophone and the correct records to access the Crazy Place and the lower levels of the Excavation Site.
The staff parts can be found in the Giant Robots' heads, each of the three robots holding one. To access the interior, the player must shoot the foot with glowing lights under it and get stepped on by it, to be sent to the robot's head. Note that only one of the feet is lit up each time a robot makes a pass, and it is randomized every time.
The yellow record can be found near Generator 5. It can spawn on the partially broken wall to the right of Stamin-Up, on the boxes near the entrance to Lightning tunnel or in the Lightning tunnel on the table at the entrance. The gramophone always spawns on the floor inside the Excavation Site, and the record to access the lower levels can be found outside around the Excavation Site.
The elemental gem can be found inside the Crazy Place, and to access it the player needs the yellow record as well as the gramophone. The entrance to the Wind tunnel is near Generator 4. Once in the Crazy Place, there will be a pedestal that will open up with a yellow glow, with the elemental gem arising from within. Note that the gem may only be picked up if the Crazy Place was accessed from the tunnel matching the element of the gem.
Once all parts have been collected, the staff may be built in the lowest level of the Excavation Site, in the yellow pedestal. After it is built, it can be picked up by any player, and if the staff is switched to another weapon later on or the player holding it bleeds out (or disconnects), the staff will return to its pedestal.
How to upgrade to Boreas' Fury
After obtaining the Staff of Wind, it can be upgraded to Boreas' Fury. First, the player must solve the riddle located in the Crazy Place, located in the Wind part of it. Above the portal, there are four concentric rings with four symbols spread evenly on them. The player has to match up the symbols on the rings above with the symbol on the pillar that the symbols are pointing to by shooting each ring with the Staff of Wind in order to rotate it. The symbols are base four representations of numbers, with the number of lines in each shape being the value for each power of four (i.e. if there is only one shape in the symbol, the value is simply the number of lines present in the shape. If there are two shapes, the value is the number of lines in the first shape times four, plus the number of lines in the last shape. If there are three shapes, the number is the number of lines in the first shape times 16, plus the number of lines in the second shape times four, plus the number of lines in the last shape). The symbols on the pillars represent the total to which each row of symbols in the rings must add up.
As the correct order never changes (though the rings are initially randomized), it is possible to use the image below as reference. An easy way is to go between the rocks to the right of the portal gateway, and match the symbols as provided. Once the rings are correctly placed, the inner rings will rotate up, and an audio cue will play.

Once the riddle in the Crazy Place has been solved, there will be another in the original realm. There are three smoking stone balls around the digsite, located at Generator 4, next to the tank's returning pathway as well as near Generator 5. The player must shoot these balls with the Staff of Wind to direct the smoke towards the Excavation Site. The ball on the tank's path has be accessed from the church by backtracking the path (or by jumping off the tank if it is returning from the tank station) so that the smoke can be directed the right way. Once all balls have been shot and the smokes are going towards the digsite, an audio cue will play and a beam of light shooting up can be seen coming from the Excavation Site.
Next, the player will have to order the floating rings inside the lower levels of the Excavation Site so that the lights on the four rings are yellow. The rings can be rotated by pulling the levers located around lower levels, two on the normal walkway and two on the wooden scaffoldings. Once all rings' lights are yellow, the yellow orb inside of them must be shot with the staff. It should glow yellow, and shoot up in the air. Finally, the player must place the staff inside the yellow pedestal in the Crazy Place, and kill approximately 20 zombies in the Crazy Place to collect their souls into the staffs. Once it is done, Samantha may talk to the player about the "power of wind being available", and the staff icon on the HUD now has a red outline. The Boreas' Fury can now be picked up from the pedestal. As with the regular Staff of Wind, if the staff is lost by any means, it will be returned to its pedestal in the Excavation Site, and it does not have to be upgraded again.
Mark IV Tank
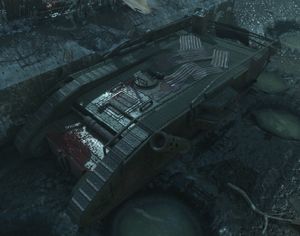
The Tank itself is very similar to the Bus on TranZit, in ways as such players can utilize the tank as a defensive platform and can move across certain parts of the map in a safer fashion. It is possible for zombies to jump onto the tank and attack the players while it is moving, but sometimes the Tank will use the flamethrowers on the sides and fires at nearby zombies to prevent this. Also, should the Panzer Soldat enter the map while the Tank is moving, it will simply take off and return once the Tank has stopped and is unavailable for some time while it cools down, possibly catching the player off-guard if they are not paying attention when it comes back. There are numerous gaps in the sections of muddy trenches that lead into another trench where normally the player must jump down to continue, but the tank crosses these large gaps. The tank can be called from the Tank Station and the church for 500 points from the switch beside where the tank stops. The tank can only be called to the location after it has been used once. The tank is needed to make the Staff of Lightning, as the player needs to reach high areas that are normally not accessable without proper elevation to acquire parts.
Der Wunderfizz

Locations
Starting room/Generator 1
Generator 2
Speed Cola/Generator 3
Juggernog/Generator 4
Stamin-up/Generator 5
Generator 6
Obtainable Perks
Double Tap Root Beer
PhD Flopper
Stamin-Up
Deadshot Daiquiri
Mule Kick
Electric Cherry
Speed Cola
Juggernog
Quick Revive
Panzer Soldat
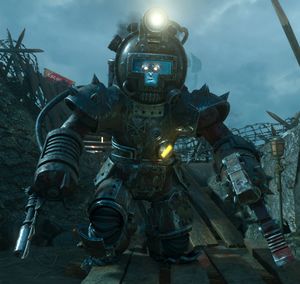
Appearance
The Panzersoldat takes the appearance of an orange/yellowish-eyed zombie in a large armoured suit. However, in Origins, the suit has a built-in flamethrower on the right, and a claw on the left, which can be shot to grab players from a distance. In Der Eisendrache and Revelations, the suit has the built-in flamethrower on the right, and an electric arm cannon that works similarly to Shock Charges on the left. Both versions of the Panzersoldat have a rocket pack on their back and smaller rocket thrusters on the back of their boots. The Panzersoldat has a highly visible bright light on its forehead. All these features make it similar to Brutus. There is also an unusually large amount of condensation on its visor, probably due to the foggy air inside the helmet. The suit's mask is similar to the Face Screen of the Zombie Shield. There is also a small smokestack behind its head. It makes a strange robotic noise before it lands.
Attacks
The Panzersoldat has multiple attacks and is a formidable foe in any situation.
In all maps, it has a flamethrower attack with low range, but deals moderate damage and impairs its target's vision with flames. It also has a powerful melee attack, which can down a player with Juggernog in two hits and a player without Juggernog in one hit.
In Origins, its other ranged attack is its claw, which is shot out of its left arm and can grab one player at a time. While a player is grabbed, he/she is vulnerable to zombie strikes and will be slowly pulled towards the Panzersoldat. Once the target is within range, the Panzersoldat will attack him/her with its flamethrower. It is possible to free yourself or another player caught in its claw by shooting the part of its arm the claw was fired from, marked by a small red light. It is possible to melee the light when close enough to it, also freeing the player. Finally, if sufficient damage is dealt to the Panzersoldat (by shooting it in the head) the player will be released. The Panzersoldat stands still while attacking with the claw and flamethrower.
Zombie Blood

A player can obtain a free Zombie Blood, once per round, unless it is raining, by shooting three flaming carts around the Excavation Site with the Staff of Ice. It does not matter if the staff is upgraded or not. The Zombie Blood will appear next to some scaffolding by the Pack-a-Punch Machine.
Another free Zombie Blood is always given as a reward in the Rituals of the Ancients box near Generator 1 after it is first turned on, except on solo, where it is replaced with a Double Points.
Although, playing a custom match on solo, it will be Zombie Blood.
When in Zombie Blood mode, Samantha may talk to the player, giving hints on how to obtain the staff parts, as well as regarding the process of freeing her and possibly talking personally to the character and revealing their history.
When the player has the Golden Shovel and is in Zombie Blood, they can see orange glowing dig spots which will reveal an Empty Perk Bottle, allowing the player to buy more than 4 perks.
Empty Perk Bottle

Locations
There are sixteen glowing dig spots around the map. The locations are:
- Between Generators 1 and 2, just outside the laboratories.
- Between Generators 1 and 2, next to the Remington 870 MCS wallbuy.
- At Generator 2, at the cul-de-sac trench, in front of a wheelbarrow.
- At Generator 2, behind the Tank Station, right next to where the tank stops.
- Between Generators 1 and 3, halfway inside the Fire Tunnel.
- Between Generators 1 and 3, next to the B23R wallbuy.
- At Generator 3, next to the repairable barricade.
- Next to the Excavation Site on Generator 4 side, where one of the Staff of Fire parts lands.
- On the tank's path to Tank Station near one of the Staff of Lightning drop-off points (accessible from No Man's Land).
- At Generator 4, next to Juggernog.
- Next to the Excavation Site on Generator 5 side, on an Odin's footprint.
- On the tank's path to Church, near the dropdown to the cul-de-sac (accessible from No Man's Land).
- At Generator 5, in front of the soul chest.
- At Generator 6, next to the Remington 870 MCS wallbuy.
- Near Church, on the tank path to Tank Station, accessible from basement of Church.
- Near Church, on the tank's returning path, accessible from basement of Church.
Blood Money
Blood Money is a power up that is featured in Origins and Shadows of Evil. It is similar to Bonus Points, as it gives the player a random amount of points ranging from 25 to 500 points when obtained. If the player kills zombies near a Blood Money power-up it will result in the player getting more points from it. In Origins this power-up can only be obtained by digging in dig spots.
Shovel

Lying in the church, at the rear of the tank near the tank's treads.
In the tunnel leading to the wind tunnel, next to Generator Station 4.
In the tunnel leading to the lightning tunnel, next to Generator Station 5.
The objects which shovels can dig up include:
- Remington 870 MCS
- A zombie
- Mauser C96
- Ballista
- A live Frag grenade
- Two live frag grenades
- M1216
- DSR 50
- A Staff of Ice part (when snowing)
- Zombie Blood
- Blood Money
- Max Ammo (Rare)
- Double Points (Rare)
- Fire Sale (Rare)
- Insta Kill (Rare)
- Nuke (Rare)
- KSG (requires Golden Shovel)
- AK74u (requires Golden Shovel)
- Golden Helmet (requires Golden Shovel)
- STG-44 (requires Golden Shovel)
- MP-40 (requires Golden Shovel)
- Claymore(s) (requires Golden Shovel)
- Empty Perk Bottle (requires Golden Shovel and has to be dug up from a glowing red/orange dig spot during Zombie Blood)
Golden Shovel
The Golden Shovel is an upgraded variant to the shovel. It allows the player(s) to dig up better and exclusive items from dig spots, such as powerful weapons, empty perk bottles and a golden helmet that protects the player from being downed by the Giant Robots' feet. In addition, there is a rarer chance to get a bad result, such as live grenades or a zombie, when digging a pile using the Golden Shovel, though they still have a chance to occur. It can be obtained by digging 30 spots in a game.
Golden Helmet
The Golden Helmet is an item that can be acquired in the map Origins. The player must have a Golden Shovel in order to receive it as a random dig.
While wearing the Golden Helmet, the player is immune to the Giant Robots. The player will be slightly stunned for a moment after they have been stepped on, but other than that they will not take any damage.
Maxis Drone

Location of Parts
- Brain
- On a table on the lower floor of the starting room, next to the stairs up to generator 1.
Frame
- In the Ice Tunnel, near generator 6, in front of the crazy place gateway
- Near the crossbone sign on the tank's pathway at the Church
- Near the crossbone sign on the returning path for the tank.
Rotors
- Near the very bottom of the Excavation Site, on top of a box on a scaffolding next to a lever
- On top of the Excavation Site near the Pack a Punch
- In the Excavation Site around the Secret Entrance
Yellow Disc Locations
On the destroyed roof beside Generator 5.
- Just outside the spawn room door to Generator 2 there will be a hole in the trenches with flaming debris. At the end you'll see the yellow disc.
- On the roof of the broken church, in the tank path heading towards Generator 4.
- On top of the scaffold above the Excavation site entrance closest to the church.
- Once all the yellow disks have been collected, a free Magna Collider (upgraded MG08/15) will be waiting at the Pack-a-Punch. Anyone can grab the Magna Collider.
Giant Robots

In Origins, there are three Rieses that roam the map, and they are described as "thousand-foot-tall robot abominations." Their names are Freya, Odin and Thor, named after three gods in the Norse mythology. In The Giant, an unfinished Riese is present in the background of the map. It is later rebuilt and present in Der Eisendrache, where it is destroyed, and later seen outside the map once more.
In Gorod Krovi, there are two destroyed Gigants, fallen due to the dragon's attack.
The Robots were created by Group 935 to help the Central Powers win the Great War. Two main scientists, Ludvig Maxis and Edward Richtofen contributed to their construction. According to Richtofen, building the Rieses was only possible due to Element 115.
InteractionEdit
In Origins, three Rieses roam the area around where the map takes place. Periodically, they will enter over the map itself, stepping down upon large foot-shaped craters in the ground. Lights placed around these areas will flash red when a Robot is about to step down upon the ground. A Robot is capable of killing zombies and downing any players caught in its foot's radius when it takes a step. It is possible for a player to enter the inside of a Riese by shooting at the lights on the undersides of their feet. Doing so results in a maintenance hatch opening up that will transport the player to their head when the Robot steps on them. It should be noted that only one of the Robots' feet will have the lights lit at a time. Additionally, when all three of the Robots tread the map at once, only one of the Robots can be entered. A piece for the Staff of Wind and an Audio Log can be found inside each Robot. There are no zombies inside the robots, however the player is allowed a limited time within the Robot. The player will be automatically ejected in approximately 30 seconds after entering, or they may eject at any time by activating one of the hatches. If a player has unearthed the Golden Helmet with the Shovel, they can survive being stepped on by a Robot, instead only becoming stunned for a while after the robot's foot clears out. Interacting with the robots is vital for obtaining the Staff of Wind, and moreover, completing Little Lost Girl. In addition to collecting the parts for Staff of Wind, three of the staffs must be placed in each of the robots' heads, and later on a red button in each head has to be pressed before throwing a G-Strike onto the seal near Generator 5.
An inactive robot is present in The Giant. It is located behind the starting room, with its head hooked on a crane. An easter egg, which involves using the teleporters with Monkey Bombs inside, will activate the robot's head, making it fire a laser beam at the Der Riese sign, bouncing off it and melting the snow on the other side, revealing a hidden Perk machine.
This robot is present in Der Eisendrache, as it is fully constructed and used by the young original characters to pursue the truck that carries the original "Tank" Dempsey. The robot is disabled by a Panzerschreck that was fired by one of the soldiers in the truck. During gameplay, it is seen laying, now damaged, at the base of one of the mountains, near a town.
In Gorod Krovi, the robots are seen employed by the Soviets, and feature the Soviet Star rather than the Iron Cross on their chests. These are used as traps around the map in which the beam in their visor activates, shooting a laser at a certain area of the map, killing the zombies that go through it. In Rumble, in one of the starting spawn rooms, there is a poster in bold words reading "The Giant" with a picture of a Riese behind the words.
G-Strike

Steps
- To get it the player must go to the tank station and collect one of the four stone tablets, every player that wants G-Strike will have to cleanse a stone of their own. The stones can be found on a table in the Tank Station.
- For the next step, the player needs to insert his tablet into the basin in the church and kill 20 zombies with melee weapons near it.
- After killing 20 zombies, the tablet can be picked up from the basin. They must then be returned to the table in the tank station without stepping in mud. If the player steps in mud, they must return to the church and place the tablet in water, and take it out, kills do not need to be redone.
- After the tablet has been placed in the tank station, 20 more zombies must then be killed near them still using melee attacks. The G-Strike will then appear once the appropriate amount of zombies have been killed. If all of them have been used a Max Ammo will replenish them. If the player happens to die, or trade them in for monkey bombs, it is possible to get them back from the Mystery Box.
The Crazy Place

Inside the circle, there are four pillars of sort, which when the player accesses The Crazy Place from a certain tunnel, the pillar will open, allowing access to the corresponding elemental gem from the tunnel they came from, meaning if the player came from the Ice tunnel, the player can obtain the Ice element gem. The player can rebuild the portal of whichever element they came from, or have been through and collected the elemental stone from, after about 15 seconds the portal will fall apart.
After solving riddles to upgrade your Elemental Staff of choice, the player can place the staff on the pillar, after doing so they must kill zombies in the Crazy Place, so that the zombie "souls" can power up the staff until an audio cue signifies that it is done.
There is an AK-74u on the wall near the Ice teleporter, costing 1200 points, and an STG-44 near the Lightning teleporter for 1400 points.
How to reach The Crazy Place
To reach The Crazy Place, the player must place the gramophone on the nearby table at the end of the tunnel, while having the record that corresponds to the elemental tunnel they are trying to access The Crazy Place from. After the gateway constructs itself, the player can run straight into it in order to enter The Crazy Place. The locations of the elemental tunnels are:
- (Fire) To the left of the spawn exit near the Rituals of the Ancients box.
- (Lightning) Near generator 5, opposite the side of the souls chest.
- (Wind) Near generator 4, next to one of the panels that spark as part of the Staff of Lightning upgrade.
- (Ice) Across from generator 6, to the left when exiting the church.
One Inch Punch

Contents[show]
Obtaining the One Inch PunchEdit
In order to obtain it, the player must charge up four chests that are located throughout the map (listed below) by killing 30 zombies near them. If a Giant Robot steps on a chest while it's not yet full, it will be reset, and the players will have to kill more zombies. In addition, zombies spawned by a dig spot will not count towards the 30 zombies required to fill the chests. Once completed, players can go to a Rituals of the Ancients station and they will be rewarded with the One Inch Punch, in the form of a glowing energy ball.
Should a player bleed out and lose their One Inch Punch, or otherwise not be present in game when the chests are completed and the Punch is unlocked, the player in question must simply go to a Ritual of the Ancients station, highlight their crosshair over the bottom-most medal, and press the action button. The Punch will then be re-obtainable for the player.
Chest locations
Three of the four footprints containing the chests are located along Odin's patrol route down the center of the map, and the fourth one is found in Freya's path down the western side of the map. The locations from north to south (the direction of all the robots' patrols) are as follows:
- The first box is located in the footprint just west of Generator 5 and the Stamin-Up machine, which is stepped on by Odin's right foot. Because this box is the northernmost footprint, it will be the first one that Odin steps on.
- The second box is located just east of the Church, or west of the Excavation site, and it is stepped on by Freya's left foot. It is the only one not in Odin's path.
- The third box is located in the footprint just east of the Excavation Site and is stepped on by Odin's left foot.
- The fourth box is located just west of Generator 4 and the Juggernog machine and is stepped on by Odin's right foot.
Iron Fists
The One Inch Punch can be upgraded during the Little Lost Girl easter egg, after hitting roughly 20 Crusader Zombies with glowing arms in the staff room of The Excavation with the One Inch Punch. To gain kills toward the Iron Fists, the actual kill does not have to be from the One Inch Punch. Hitting a Crusader Zombie once will cause it lose the glow on their arms, and this counts toward the reward. After reaching the amount, a power-up resembling a stone for the G-Strike will be dropped. It gains a one hit kill attack until round 36 and has an extra elemental attack depending on which staff the player was holding at the time of the pickup; for example, players with the Fire Staff will set zombies on fire with their punches.
Easter Eggs
A new song, Archangel (sung by Elena Siegman, Malukah & Clark S. Nova), can be activated by pressing the action button in front of three green stone blocks scattered around the map. Locations are:
- In the spawn room right of the ancient chest on the other side of the bunk bed.
- On the second floor of the work station opposite the stairway under a bed.
- On the scaffolding left of the entrance to the Excavation Site entrance facing spawn area next to a crate.
Another song, Shepherd of Fire (by Avenged Sevenfold), can be activated by pressing the action button in front of three red radios scattered around the map. This is the song that plays in the intro to the map. In the Black Ops III version of the map, the Radio's fronts are removed, showing the
inside of the Radio itself. - On the scaffolding within the Excavation Site, above the possible Maxis Drone part location.
- In the Giant Robot Freya, opposite of the audio log.
- On the left edge of the fire area in the Crazy place.
Another song, Aether, can be activated by pressing the action button when prone in front of both "1" floor panels at Generator 1 & a "5" at Generator 5 (Generator 5 must be powered on).Ciphers and Scrap Paper
Main article: Origins/Ciphers and Scrap Paper
Five ciphers can be found in the map as well as one scrap paper. The ciphers give some backstory to the events before Origins while the scrap paper shows a drawing of Primis.Jumpscare
When zooming in at the burning church with a sniper rifle (such as a DSR 50), a picture of a skull suddenly appears on the player's screen accompanied with a high-pitched scream, similarly to the jumpscare in Mob of the Dead.
Little Lost Girl (Origins Main Easter Egg)

This achievement/trophy can be obtained with any number of players, including solo.
In the Black Ops II version, it should be noted that proceeding past step 1 is impossible on Easy difficulty.
Step 1: Secure the keys
Obtain and upgrade all four elemental staffs; the Staff of Fire, Staff of Ice, Staff of Lightning and Staff of Wind.
For a detailed guide to obtaining and upgrading the staffs, please visit their respective pages.
Step 2: Ascend from darkness
Once all the staffs are upgraded, the players must place each of the four staffs in the pedestals that have now appeared around the map. One pedestal spawns in front of the original staff pedestals on the lowest level of the Excavation Site, and three more spawn in each of the Giant Robot's head. Each pedestal only takes a specific staff. Once the staffs have been placed, they cannot be picked up until after this step is completed, which is when they return to their original pedestals in the Excavation Site.
- Ull's Arrow (ice) is placed in Freya, the left robot that treads around the Church.
- Boreas' Fury (wind) in Odin, the center robot that treads the Excavation Site.
- Kimat's Bite (lightning) in Thor, the right robot that treads over Generators 2 & 3.
- Kagutsuchi's Blood (fire) in the staff room, the fourth pedestal in the center of the area in front of the original four pedestals.
The staffs can be put in any order. The player will know if this task is completed correctly as Samantha will give a voice notification, and all staffs will be available again in the staff room while the pedestals used for the step will despawn. In the Black Ops II version only, a glitch also exists where the player can trick the game into thinking all the staffs have been placed in the pedestals, making this step almost effortless. To do this, put the Fire staff in the newly spawned pedestal inside the excavation site and press the action button on its original pedestal to regain the staff. Repeat the process three more times. When done, a music cue will play, Samantha will talk to the player and the fourth pedestal will vanish. Note that doing this glitch may have some unwanted side effects, though they are mostly visual bugs. Note: This step can only be initiated and completed if all 115 Generators are active, otherwise the pedestals for the staffs do not spawn or despawn.
Step 3: Rain fire
After placing all the staffs in the pedestals, all three robots now continuously roam the map at the same time until this step is completed. Only one of their feet will be lit up, meaning only one can be entered at a time. Before proceeding with this step, at least one player must have G-Strike obtained. It is recommended to try obtaining it as soon as possible before killing zombies with melee required for obtaining it becomes too difficult. It can be obtained before starting any of the other steps. One player needs to enter one of the robots and press the red button that has appeared. As soon as the button is pressed, another player has to throw a G-Strike beacon on the seal behind and to the right of Generator 5, out of bounds. It looks like a big circle of cracked stone on the ground. If the G-Strike is thrown inaccurately, it will disappear and the Demonic Announcer can be heard laughing. If done correctly and soon enough from pressing the red button, the robots will fire an artillery on the seal, breaking it. Samantha can be heard talking, and a small audio cue plays. To do this in solo, the player must enter Odin from either footprint (although for less experienced players the Stamin-Up side is recommended, as you have more of an idea of where you're throwing the G-Strike), and press the red button as soon as Maxis says "one" during the purge sequence (as being purged is quicker than ejecting manually). Immediately after landing, run to the seal, prime the G-Strike on the way and throw it onto the seal. This must be done quickly, as the time window is short. This can also be done from the footprint next to the Lightning tunnel, but it is less optimal. It is important to remember that it may take a lot of time to get the correct foot, and even then success is not guaranteed if the player is too slow, making patience more than necessary.
Step 4: Unleash the horde
After breaking the seal, deploy the Maxis Drone near it. He will enter the pit, and soon after ten Panzer Soldats will fly out and attack the players. High-damage weapons such as Ray Gun Mark II, G-Strike or the upgraded staffs are recommended to dispatch them. After killing all of them, the players can move onto the next step.
Step 5: Skewer the winged beast
When the player obtains a Zombie Blood, they can see a plane in the sky glowing yellow, similar to the one that drops a piece for Staff of Fire. When it is shot down, its zombie pilot will drop down to the ground. The zombie will circle the Excavation Site in a clockwise pattern, and like the plane it was in, it can only be seen in Zombie Blood. It sounds like a Templar/Crusader Zombie, but looks similar to the regular ones. It is wise to go counter-clockwise around the Excavation Site as that way the player will run into the zombie at some point. After killing it, it will drop the Maxis Drone, which has now more firepower including a Pack-a-Punched version of its machine gun.
Step 6: Wield a fist of iron
All players must now obtain the One Inch Punch from Rituals of the Ancients (if they do not have it yet) and upgrade it by hitting 20 Crusader Zombies each with white glowing arms inside the Excavation Site with it. Merely hitting the zombie with the air coming from the One Inch Punch attack is enough, and thus the players do not necessarily need to kill the zombies with it, though it will help to prevent the player from being surrounded. Once the player has hit enough zombies, a tablet with a white glow will drop, which can be picked up to obtain the Iron Fist. Note that picking it up will make a short white flash that can blind the player momentarily, but also cause any nearby zombies to be knocked over for a few seconds. Although, after round 20 the zombies will not be knocked over, they will be stunned for around half a second.
All players in the game must obtain the Iron Fist. It is recommended to not hit Crusader Zombies that are just coming in from the walls, as the tablet can drop out of the player's reach, making the rest of the easter egg impossible to complete.Step 7: Raise hell
The staffs must now be placed inside the Crazy Place on their respective pedestals. After all have been placed, 100 Templar Zombies must be killed inside the Crazy Place. If done correctly, the zombies' souls will flow up into the center. When enough zombies are killed, the screen will flash bright, and the portal has now been opened, making the ceiling of the Crazy Place look like a vortex.
Note: Completing this step unlocks the achievement/trophy, making the following step optional. The rocks that create pathways in the Crazy Place will also stop falling down after this step, making it a viable holdout location as the player's pathway is no longer obstructed at random, giving the player a wide open area with no threat from Panzersoldats or the Giant Robots as well as pedestals for all the staffs.
Little Lost Girl (Origins Main Easter Egg) (Continued)
Step 8: Freedom
If the player wishes to free Samantha and complete the easter egg, they need to deploy the Maxis Drone in the Crazy Place. He will rise up into the portal, saying "Samantha, I must go to her, the paradox must be resolved." After this, the player can hold the action button on the blue rock in the center to "access the teleporter", which ends the game. The ending music will be different, and the camera will pan into the portal instead of showing the Excavation Site and the Giant Robots as usual. After the scoreboard is shown, a special cutscene will also play.
Fast Fact:
The steps for this easter egg are the same steps that Viktor Renov and Alex Mason came of in on the misson Vorkuta on Call of Duty: Black Ops
End
Thank you for reading my guide, make sure you favorite, comment and like! Stay calm and keep killing on!
Keenstar EX
-Out
Best Call of Duty Black Ops 2 Map Pack
Source: https://steamcommunity.com/sharedfiles/filedetails/?id=1495345374
0 Response to "Best Call of Duty Black Ops 2 Map Pack"
Post a Comment